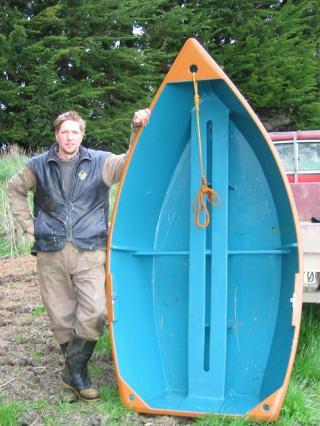
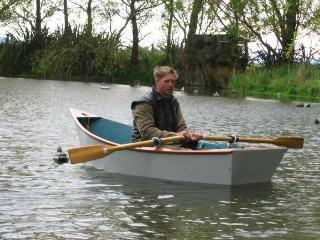
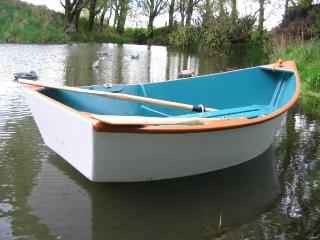
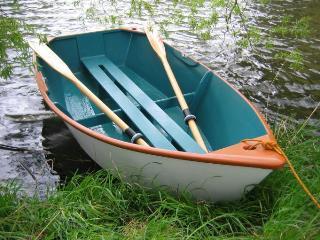
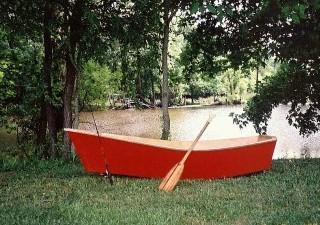
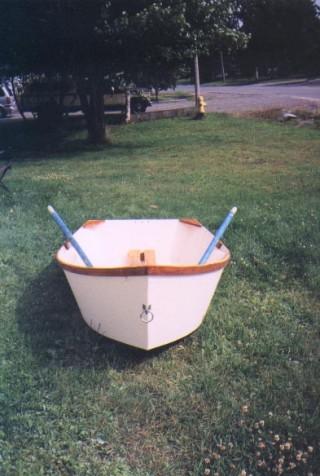
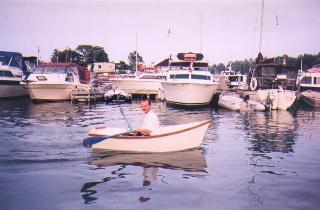
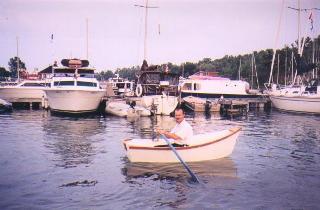
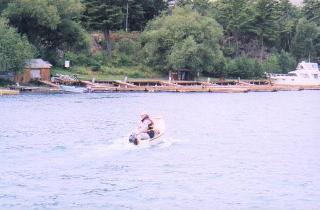
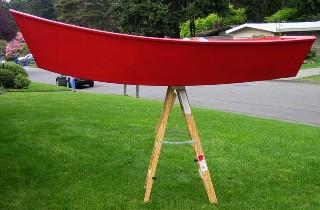
Here are some photos of my portuguese dinghy. I can't tell you how much fun it is. Thanks so much!
Mark
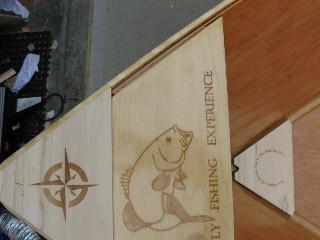
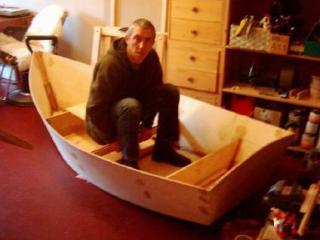
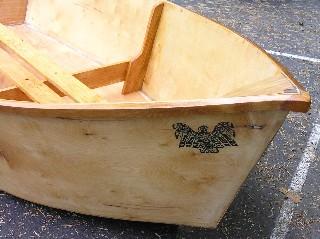
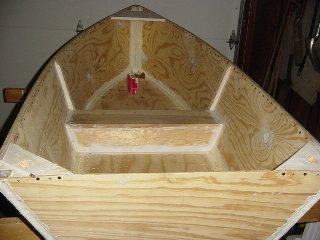
I just finished my second boat. This time it is the six foot Portuguese Dinghy. I did some carving on this one as well as engraving.
Thanks,
Mike
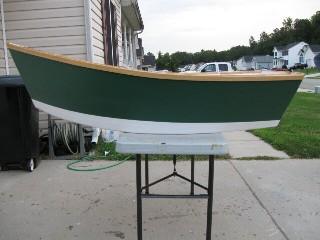
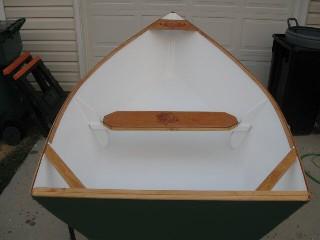
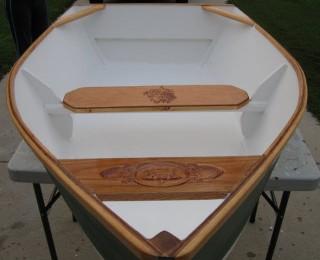

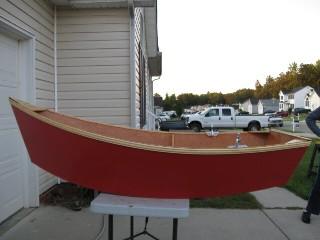
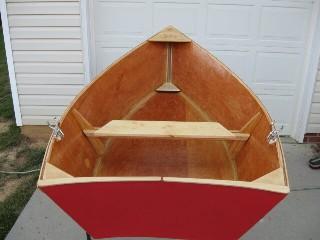
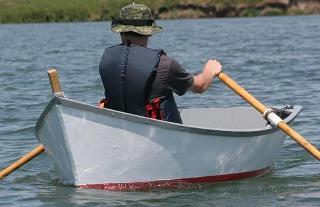
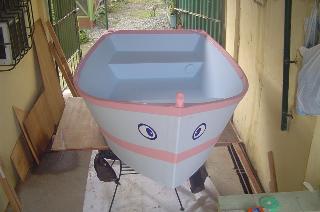
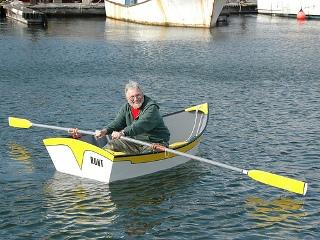
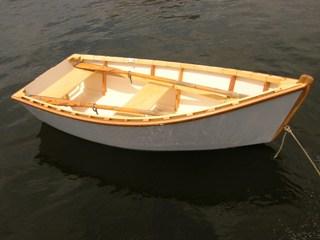
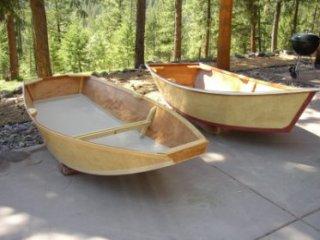
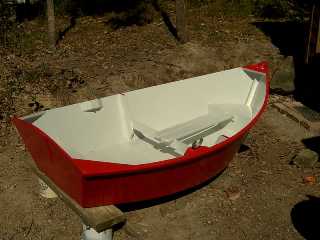
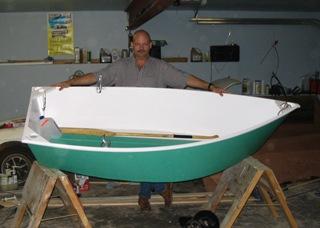
I finished the boat a few weeks ago and drove it up to Rhode Island as a gift for my friend’s father who retired this year and just started a fly-fishing venture. Attached are some photos. This is the 7’-4” version. I am now building a six-foot version with the extra sheet of marine ply and leftover epoxy, wood, etc.
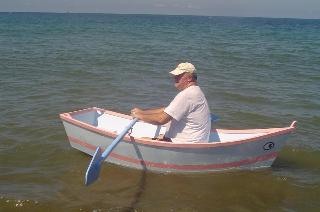
Thanks again for the great plans and instructions. This is the first time I have ever built something larger than a birdhouse and am happy with the outcome.
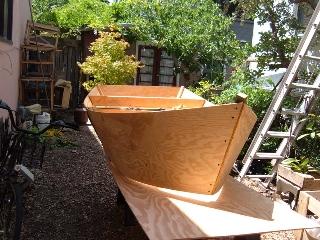
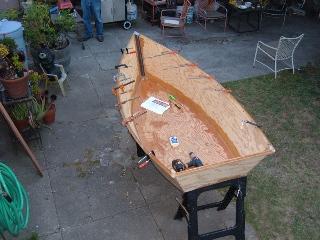
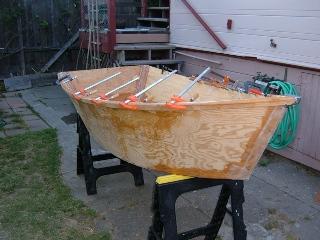
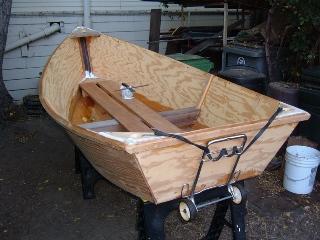
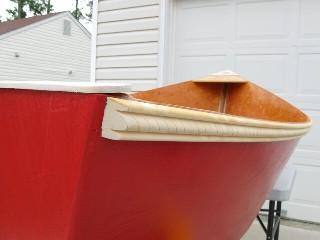
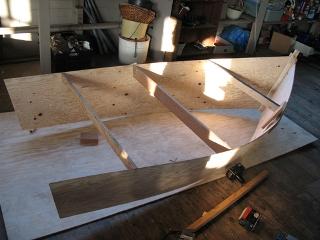
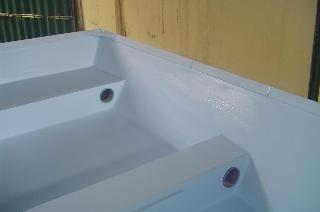
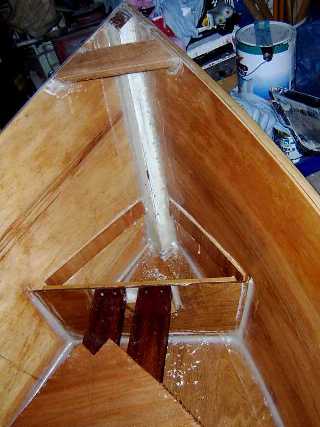
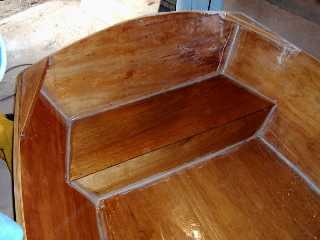
I added a second transom board and made the outermost transom curve inward. I then reinforced the area between transom boards with fiberglass and thickened epoxy and added a two-piece transom cover and removable motor-board. The space is open in case he wishes to add flotation foam in the future.
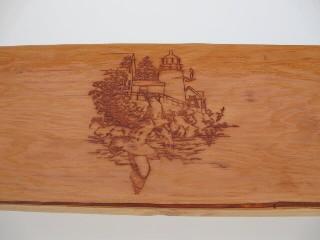
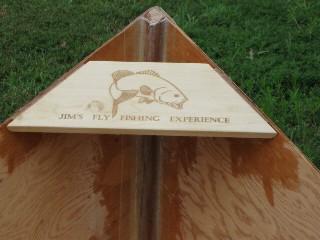
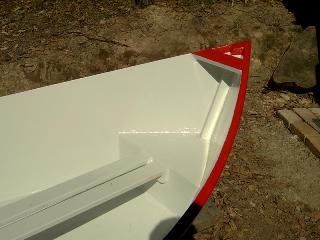
I also used a carved rub-rail and customized the bow knee to make the boat unique to his area. There are a lot of small boats in Bristol Rhode Island but none exactly like this ;-)
Thanks again,
Mike
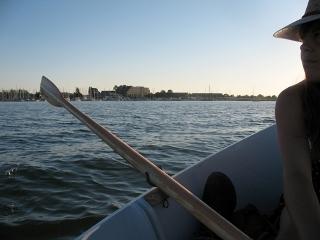
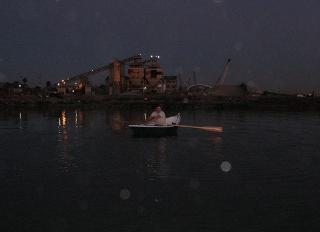
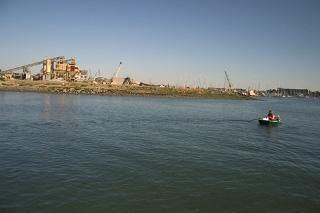
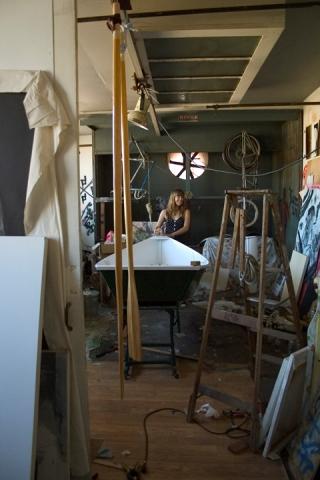
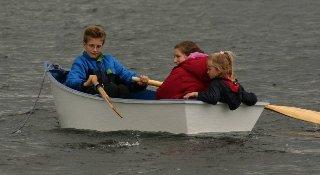
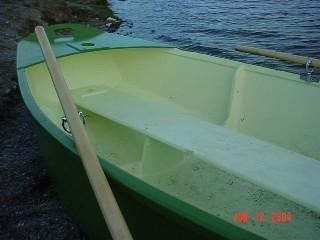
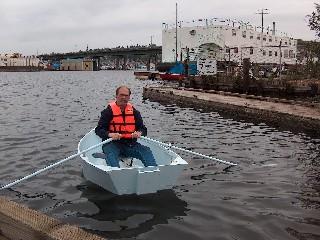
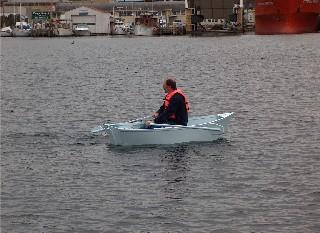
Thank you so much for the wonderful boat plans and the great website. I got so excited when i came across this dinghy! It is perfect. I love it! Never thought i'd build a boat. But it floats and it goes and it's stable and zippy and awesome!! The lengthwise seat is pure genius, it makes the whole passenger-thing work really nicely. Very very good. I put in a second pair of oarlock-holders farther forward for rowing with two people.
Here's pictures from Iffy's maiden voyage in the San
Francisco Bay (it wasn't that dark out it was the flash..)
THANKS!!
Gaby
Oakland, California
I'd like to thank you for this incredible nice plan to built this
tiny dinghi. Last sunday was the day of ours and Alfons'
maiden voyage. Great feeling. It fits two adults on calm waters.
The next one will get a little lug rigg but still in the mind of
being easy to built and easy to handle with.
The boat is made of 6.5 mm plywood ( birch ) from a local
lumberyard and some pieces (12 mm ) left over from other
projects ( VW T4 Camper ) and the parts from this thing to
lay your matress on ( I don't the english term for it )
that became the seat.
The "Big sister" would be a dream to built and to row, but
at the moment we are not in the situation to enough place.
But it will be done, this I am damn sure about.
"Someone has to do the stupid things in the world." -
There should be more than one and when I had the first
looks at the galleries on your site I have seen more of
them than I ever expected. Still not enough but we are
getting more, hopefully.
Best regards and keep up with your ideas.
Lars


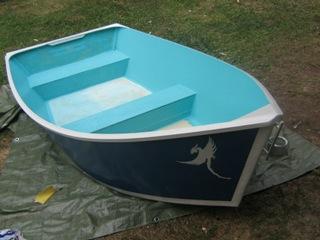
These are som pictures of the portugese dinghy my gradfather and I built.
The boats' name is MANANAN after the celtic god of the sea. It took us about a month of work to get her totaly finished. She recently underwent an overhaul and now runs a square sail, and jib. An absolutely lovely boat, she's given great service. She also carries my coracle (also built from your plans) ADERYN to many great places.
Thanks for the plans.
Jonas in Cochrane Canada


Thank you for the this website. Me and my dad made one of your boats together. I attached a tiff file with pictures of it.
Thank you,
Andrew
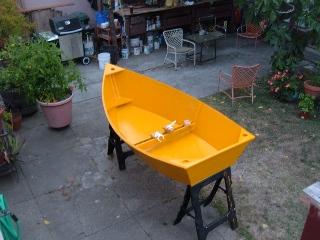
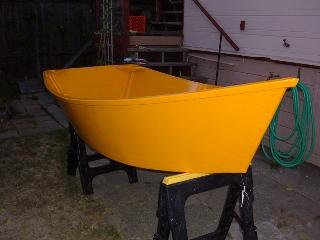
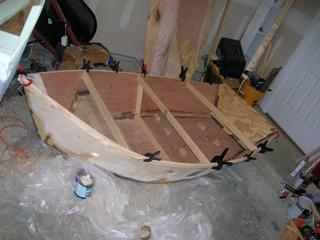
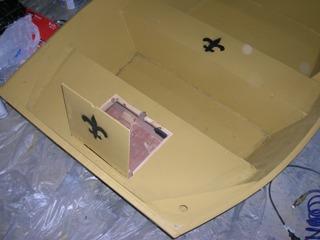
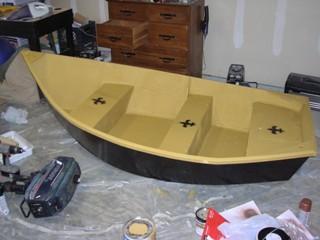
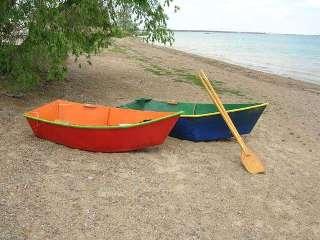
Here's my Version of your Dinghy Design, I'm not completely done with all the detail painting on her, but she's finished and had her maiden Voyage. I opted for seating that went side to side rather than the length wise seating you implemented into yours. In the Rear seat I added a little door for to use the space for storage. Thanks so much for your plans once again. I'm going to name her "Not Dumb Just Dinghy". I know you reside in Europe somewhere so I'm not sure you are familiar with the NFL or the New Orleans Saints but she is painted the colors of the team. You may also note that I have a little Evinrude motor I dug up from an old shed. That is for my next boat I'm Building, which is an adaptation of you 10 1/2' skiff. More of those to come. Thanks for many hours of enjoyment building & using my wooden toy.
Wes
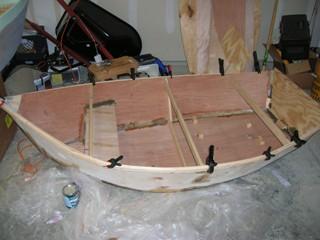
P.S. - I also have a shot of the Micro Dinghy I made form some scraps I had left over from another project, that one is 57 1/4" in total length. It's not very practical but very fun to play with. Naturally with such steep side she's very wobbly but surprisingly fast in the water.
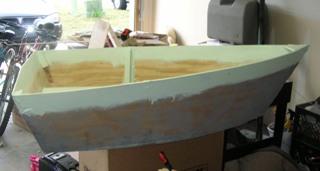
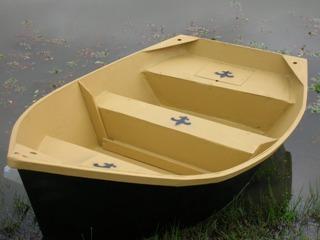
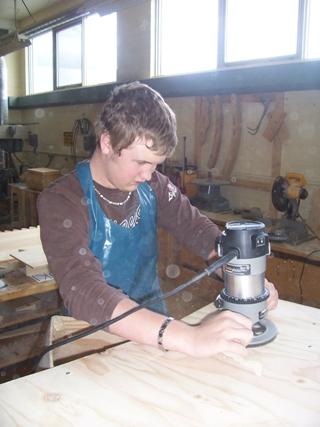
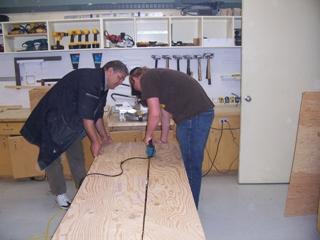
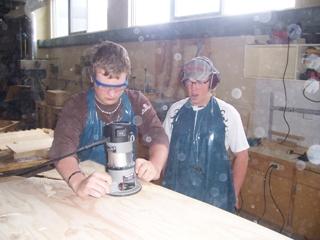
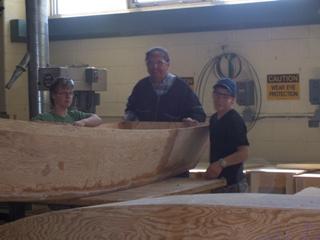
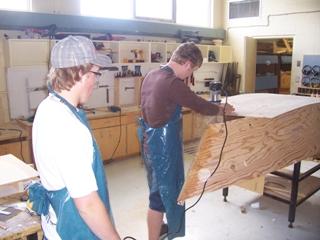
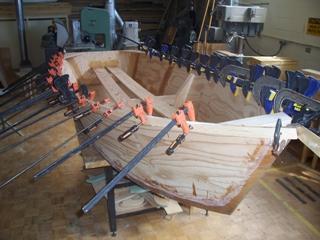
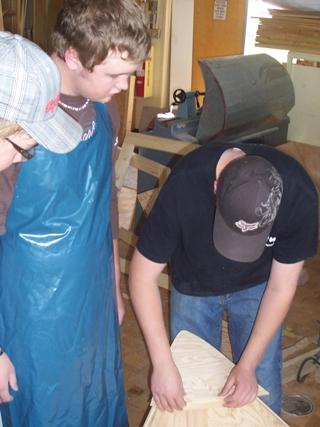
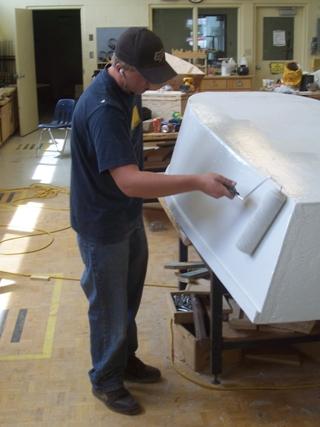
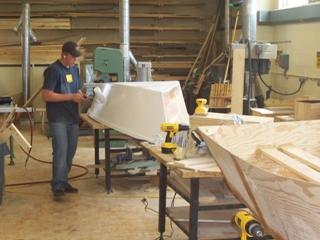
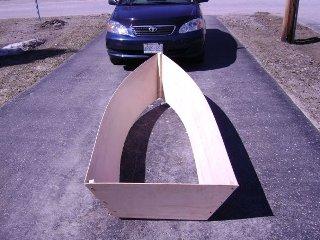
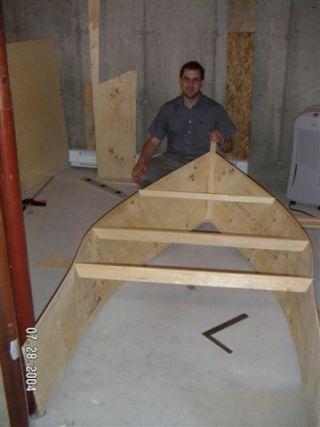
Students building boats.
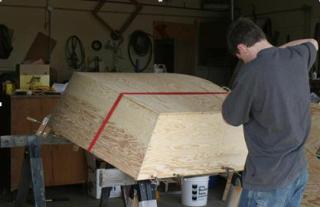
We placed the sides and transom onto the bottom, checked for square,
attached 2x2 blocks, and attached the top to the bottom like a Dug.
After glassing the inside of the chine we flipped the hull and
routed the bottom, finishing smoothing with a belt sander.


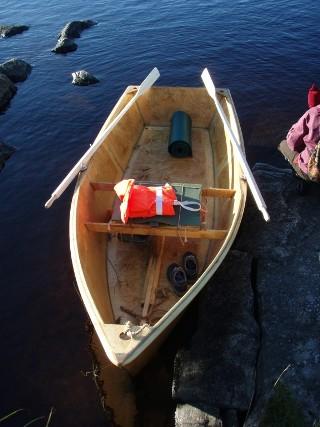
I want to thank you for posting a web site with such wonderful instructions on boat building. In the spring of 2008 I built my first boat following your plans for a Portuguese Style Dinghy, and I must say it was very easy and rewarding. I have never attempted anything like this before thinking “ya like I can build a boat” but sure enough just 2 weeks and only a few splinters later Voila! The boat serves its purpose perfectly, light, easy to row, and holds a lot of gear needed for my week long camping trips on the river bank. I am looking forward to building my next boat using your plans this spring.
Thanks again
Brad

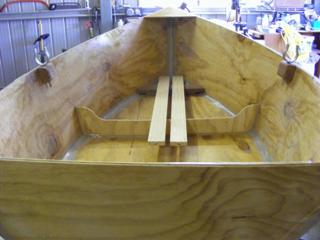
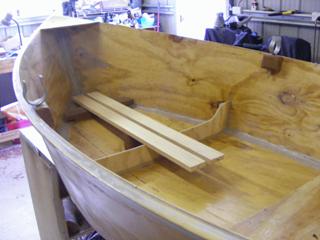
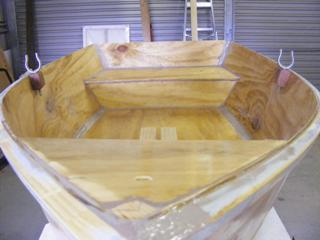
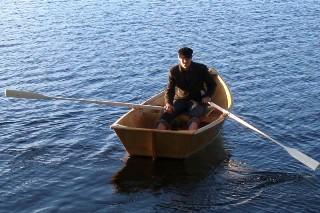
I bought an issue of "Australian Amateur Boatbuilder" on a whim for some fun reading, having always been a bit interested in boats. It had an article by a guy who built his first boat based on your Portuguese Style Dinghy design, and that looked like something I could build so I found your web site and printed the plans.
I live 300 kms from the coast so marine ply isn't a big seller around here, and suppliers in Sydney wouldn't ship it because it always gets bent apparently, so I had to go with plain old CD (construction) ply.
Anyway, we've given it it's first test float and paddled around in it and it seemed water-tight and stable. Since then I've added the seat for me to row and the rowlocks. It needs sanding and painting now and should then be ready for the official launch :)
I've attached some pictures. I put a seat across the back for the boys to sit on and shortend the longitudinal seat.
Thanks for publishing your plans for free and designing some simple boats that anyone can build. I won't say it was easy but I think I've learned enough that I'm going to have a go at a sailing dinghy next and hope the boys grow up to have some "Swallows and Amazons" type adventures around our town! Using the cheap plys (and a lot less epoxy next time) should make it relatively cheap anyway, even if it all goes wrong.
Regards,
David
Orange, NSW, Australia
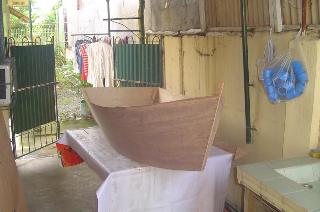
Thanks for the inspiration and the great set of instructions and easy to follow plans.
I recently retired to the seaside in the Philippines and decided I needed a hobby. But there is no “western style” boat building tradition here so many common tool and materials found in the west are rare, if they can be found at all.
Fiberglass and epoxy resin is not use in any of the local fishing boat building, but 1 to 1 Marine epoxy putty is in every common, so when in Rome….
I did manage to find someone who knew of a place he could obtain fiberglass and resin , some 240km away from where I’m living so I had him pick up some on one of his trips there.
It was a very thin mat of fiberglass, not a woven cloth like material. I assume it was primarily for small model building, but I used it anyway to do all the major seams inside and out.
But as the boat is small and all the fishing boats here are built just using epoxy putty, I thought it would do in a pinch.
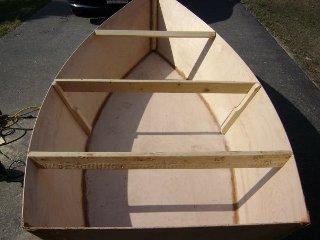
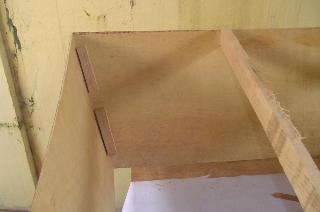
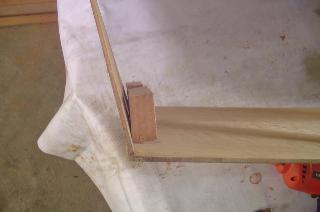
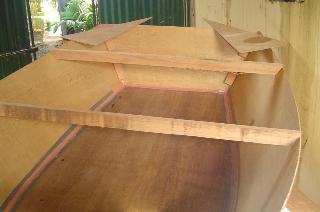
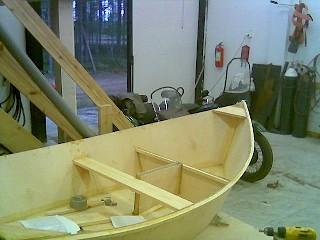
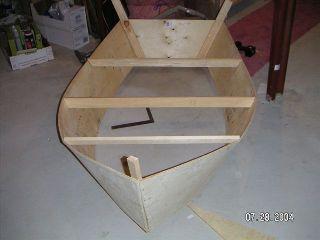
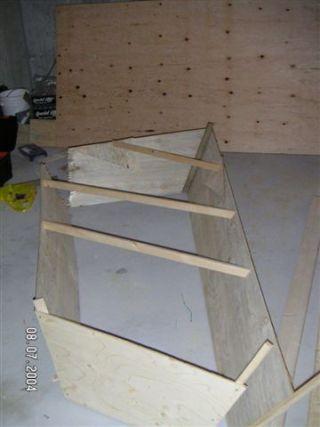
A few small hints/tricks that seemed to go well for me were to assemble the side panels to the transom ( all 4 mm marine plywood) using butt blocks and 1inch screw and then inserting the spreaders. As I was working alone I thought I would try this approach. After the second spreader I could see that a curve was developing in the side panels and transom, but by backing off the screws in the transom butt blocks this was removed, and the last spreader was installed.
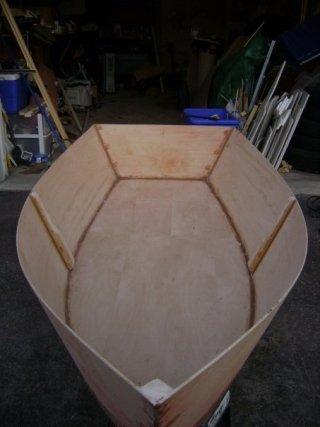
As I was using commercial marine epoxy putty and was going to glass over the cured putty, I also saved a lot of putty sanding time by using masking tape on either side of the joint that I was being putty welded. A plastic baggy over your finger also turned out to be a very good epoxy putty smoothing tool in those tight corners were sanding might be a problem.
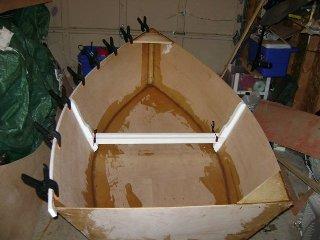
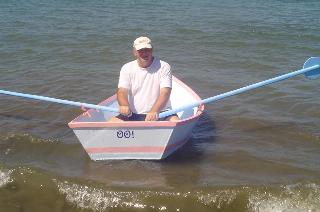
I also built flotation tank seats with small access ports to allow any moisture to escape if I felt it was warranted.
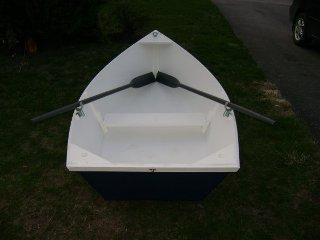
I Christened her OO! This is the Tagalong word for YES! The local fishermen laughed at me when they saw her,( a boat without outriggers) but so soon fell quiet as they watched her underway! She is a nice little boat.. Thanks again. Plans are already underway to build the 10.5 footer for a local resort owner, he wants a Plexiglas window in the bottom for his clients to view the reef ! Ill keep you posted!
John
Bauang La Union Philippines.


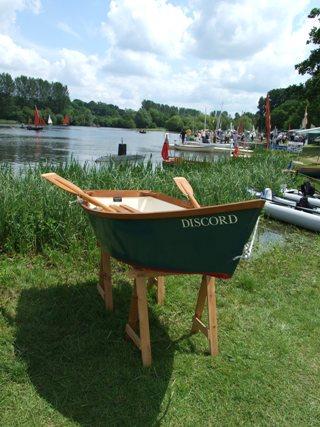
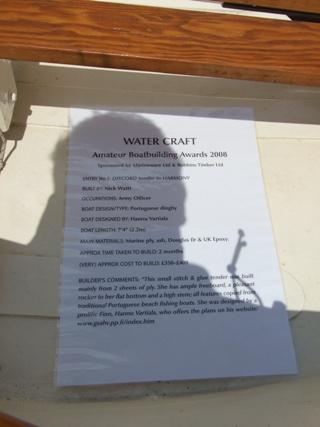
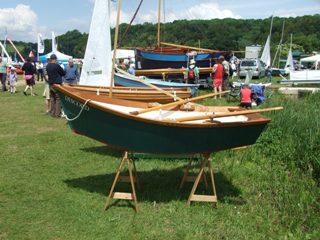
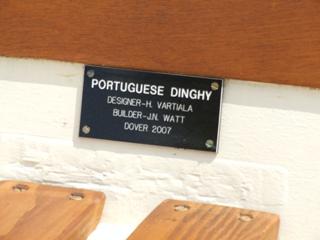
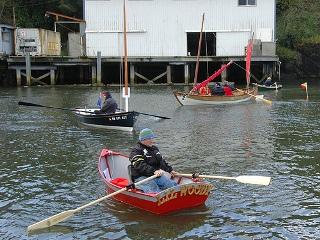
A Portuguese style dinghy at the Beale Park boat show 2008.
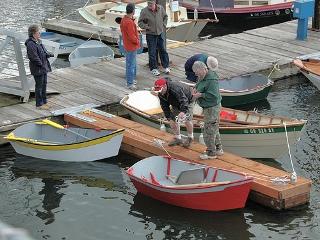
"Mass production" of Portuguese style dinghies.
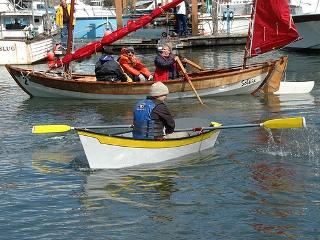
And a few Portuguese style dinghies at Depoe Bay 2008 Wooden Boat Festival.
Two Portuguese style dinghies, a 6 ft one and an 8 ft one, at Instructables. More step-by-step instructions there. They won the first prize in the Instructables Book Contest, by the way.
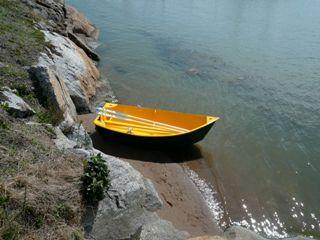
I have just completed the Portuguese style dingy from your website. I used 1/4" marine plywood and oak and douglas fir framing, steam bent chines, inwales, outwales, and seat rails. The seats are pine. I made one slight variation to your hull design, I used a 60 degree stem angle instead of 90 degree. I added a false stem and a keel. The dingy rows well, it is fast! It is stable while under way but while stopped, it is a bit tippy. I set the seats 10" high, maybee 8" would be better. I put many coats of gloss varnish on the woodwork, it is very beautifull. The overall length is 7'9" and the beam is 42".
Thanks for the inspiration to build my first boat. I am currently working on a new design based on a Norway Faering, 13' length, double ended. I will use your plywood panel techniques along with the steam bent framing.
John, New London, CT USA

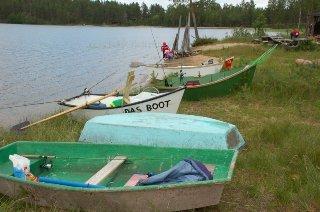
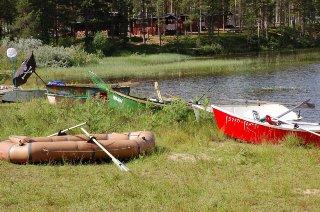
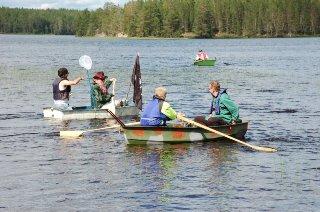
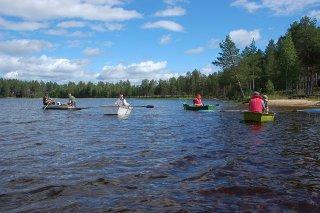
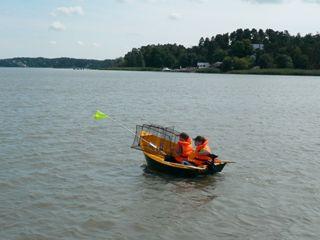
Several Portuguese style dinghies at the Small Boat Fishing Finnish Championships 2007 and 2008.


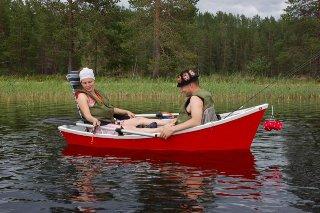
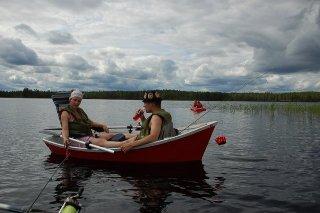
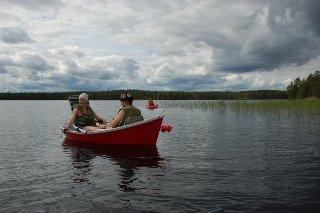


A couple of pictures of my new Portuguese style dinghy.
Mika
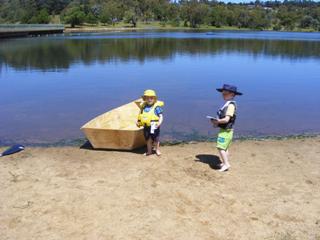
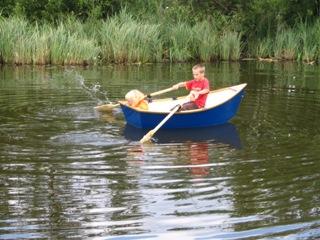
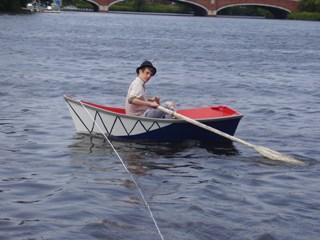
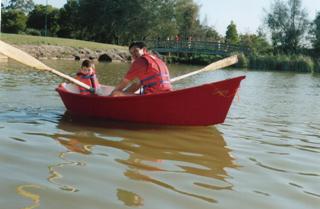
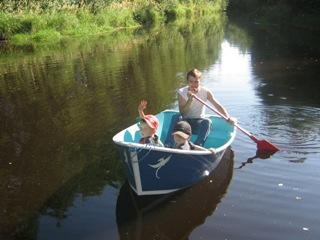
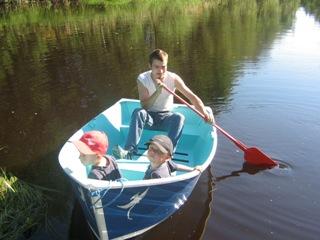
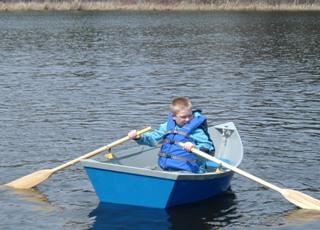
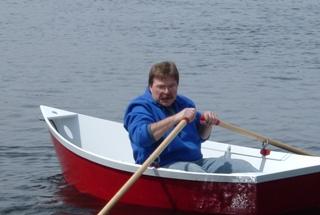
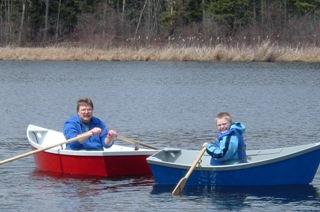
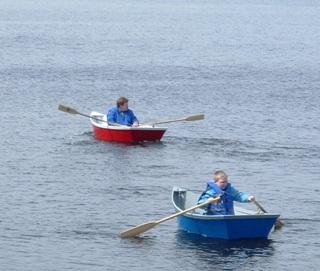
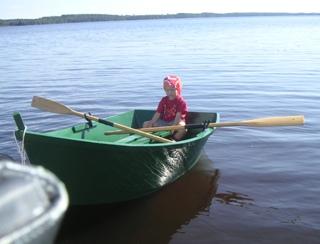
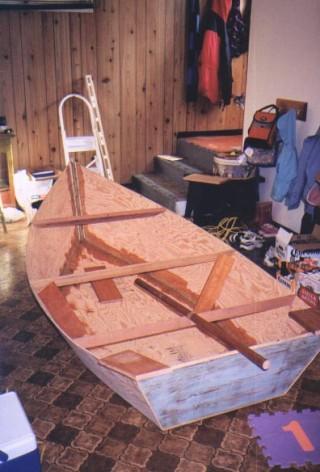
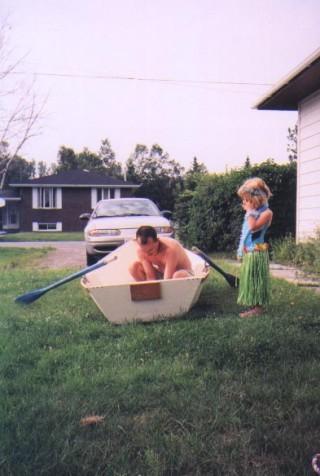
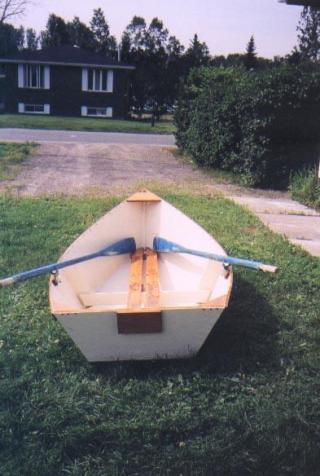
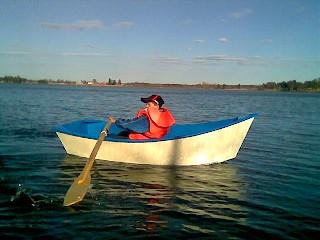
My 8 year old grandson and I had much fun building the 6 feet version of the portugese style dinghy in the spring of this year. It was our first boat building project and everything went fine, including the making of the oars (laminated from 18*18 mm fir). The attachment shows the happy owner and his baby sister having a great time after launching for the first time. Thanks for a interesting website and for a great design.
Regards,
Dick
Zeist, the Netherlands
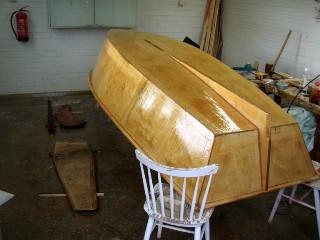
Firstly I'd like to thank you for taking the time and effort designing and publishing your boats for all to see and copy. I especially liked the Portuguese Style Dingy and that's the one I ended up building.
This is the third plywood and epoxy boat I have made and by far the simplest, cheapest and quickest to construct one of them all. It was for these reason that I just had to make it, and it doesn't look half bad either. I was sure I could find a use for it and that I did. I was only half way into the building process when a neighbor came over and noticed her in the workshop and said "That's just what I need, name your price". I was quite shocked I hadn't had anyone offer me money for something I'd made before, never mind something only half built. I though I'd better wait until I'm sure it floats before I look at selling it or building another.
I ended up epoxy coating the whole boat, taped up the seams and also use some spare cloth to fiber glass the bottom. So she's pretty tough with epoxy, two coats of undercoat and three topcoats. I made the seat a little higher, but I liked the idea of the split seat, so I used some 12mm ply, with a reinforced strip underneath.
I tested the boat in the duck pond today, she handles well and darts around the pond with ease.
Daniel Brooks

My new Portuguese style dinghy.
Olli
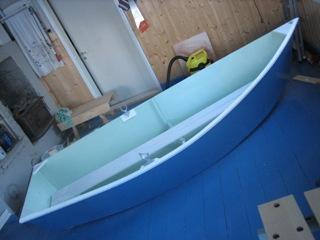
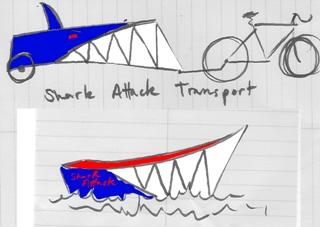
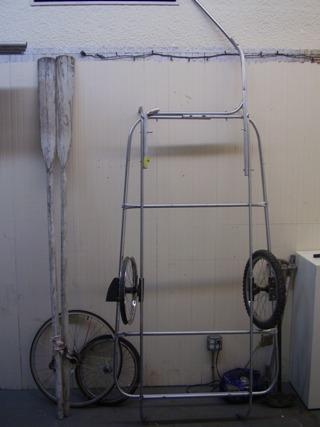
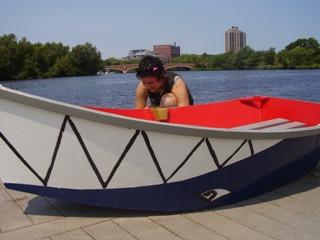
I wanted to write and share with you some images of the boat I just made following your plans. I have a friend who has already made one as well, and another planning to make one.
I am also building a custom bike trailer for the boat, which i have included a photo of.
thanks for the plans,
Veronique

Yesterday (Tuesday 16 Oct) was a gorgeous Greek Autumn sunny day and I went to throw the boat into the water in a neaby lake, as a good test before I paint it. It was marvelous , I thank you very much for everything!...
I am sending you some photoes of the experience, so you may partake from afar. More photoes after I paint it.
Thanks again
Sakis


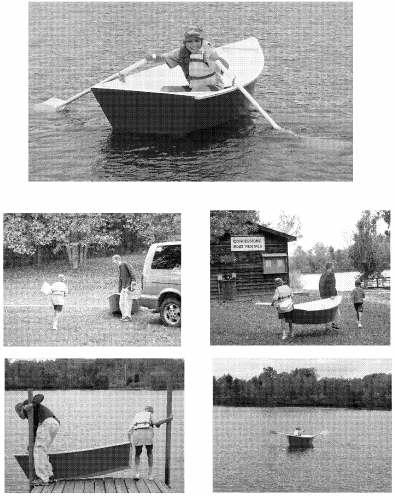
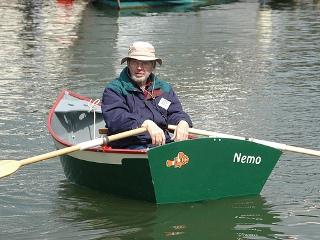
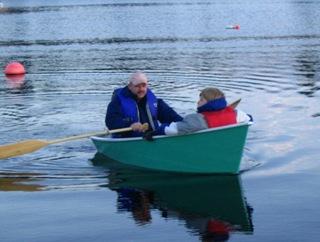
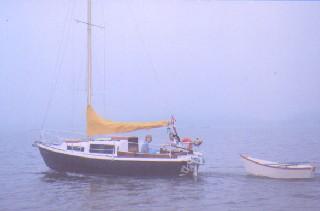
I just want to thank you for the excellent boat designs and information available on your website. I have been referring to it for the past year or so and have built the Portuguese dingy and the Mini Auray punt shown in the photo below. I receive a lot of interest every time I take the boats out and have referred a number of people to your web site.
I used the Portugese dingy all last summer as the dingy for our sailboat, and it was just great. It towed perfectly behind our sailboat, rowed well, could carry three people, and held up well to heavy use. The photo shows me rowing my grandson and daughter in law to our sailboat.
I volunteer at a boy scout camp in the summers and I'm sure the boys will enjoy rowing the punt.
I look forward to building the ten and a half or twelve foot skiff you recently added to the site. Thanks again and keep up the good work.
Best Regards
Larry
Frenchtown, Montana USA

Thank you for providing all the information on you website. We have found it very valuable.
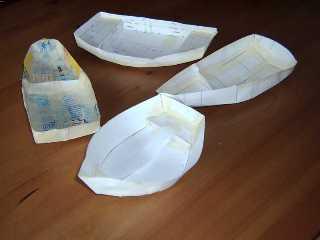
I am the father of two young boys and the eldest, Horatio (4 ˝ years old), decided we should build a boat. Most parents wouldn’t have taken him seriously but I thought “why not?”. We searched the web for information and discovered many designs and building hints. We even made a few models of different designs. I have now had the experience of teaching my son about model making to evaluate a design. Since then I have seen him spontaneously modelling designs for other projects. Not bad at 4 ˝!
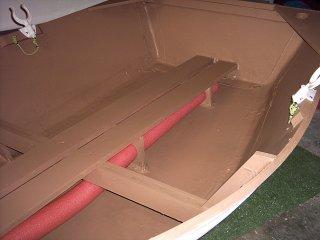
Eventually we decided (with a bit of pressure from me) to build your Portuguese dingy design. But Horatio liked the idea of buoyancy tanks under the seats like the D4, so I modified the design to incorporate this safety feature. I also realised that, if you have an aft seat then you will be unlikely to ever need to sit between the centre thwart and the aft seat. So I only incorporated longitudinal seating from the thwart forward. I also designed a small ballast tank in the bow. Lastly I gave the transom a curved top, partly for looks and partly so that I might someday attach a small outboard – the extra 75mm of freeboard will help mount the outboard at the correct depth (I hope).
Horatio chose the colours and helped me with most tasks (even some power tool jobs – with lots of guidance). It was a great project to do together and we are both proud of ourselves. I was really surprised at how easy and quick it was. Probably 25 hours all up.
Horatio has named the boat Smiggy. Her maiden voyage will probably be this weekend. The photos of “Smiggy’s” maiden voyage speak for themselves.
Thanks again,
Andrew


After researching many websites and books searching for boat plans, I decided to build your portuguese style dinghy. I redesigned a couple of interior aspects, and also added the rudder and daggerboard, so that I could use it with a sail.
Last night was the boat's maiden voyage out in the Boston harbor, and it sailed very well, especially under the light wind conditions. I decided to go with a gaff rig with a small jib, both home-made out of canvas. I have to tweak a couple pieces, and simplify a line or two, but other than that, it works very well! I may even build a larger jib, something with the likes of a genoa. Thanks for the plans on your website, construction was very easy!
Brian
Tanks for the interesting pages!
Pauli

The material is 6.5 mm birch plywood, a handful of 16 mm screws, a couple of 25 mm screws, two tubes of Sikaflex 11FC and a bunch of pine planks.
One can really start boating this way!
Saku

I would like to extend my sincere appreciation and thanks for your generous posting of plans and instructions on your website.
They have brought much happiness to many individuals and families.
I recently finished building your “Portugeuse” pram for use by my 10 year old sone and have enclosed a few pictures for your amusement. Thanks again.
Scott

I found your website and thought that it would be very cool if I could build my own boat. At first I thought that there would be no way that I could build a boat. I told all of my friends and my father when I started constructing the boat. They all said the same thing: "yeah right, you will never be able to build a boat that will actually float". Well, I think all this talk just pumped me up a little bit more. I have been working on it in my free time and I am now in the last steps of painting.
It looks like I may have proved them ALL wrong. So, I just wanted to thank you for all the time you have dedicated to making a site that helped me to create my masterpiece. I am just finishing up and I pray that it floats. I used the plans for your Portugeuse fishing dinghy, but changed the seating.
Scott
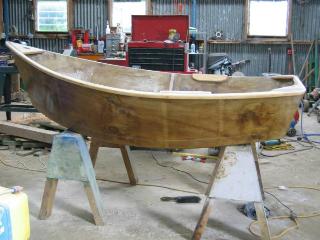
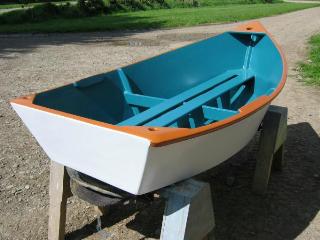
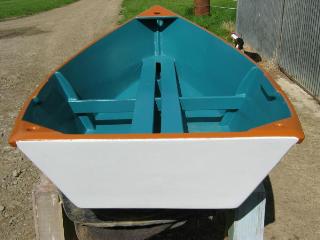
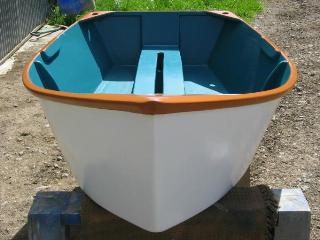
My son and I had great fun making your Portugese style dinghy.The first boat I've made. Learned a lot in the process. In particular learned to get better quality ply - ours split during the bending process. So we skinned the boat with glass fibre and resin. It increased the weight a bit, but that resulted in greater stability and strength.
Mark
My new Portuguese style dinghy, all measurements scaled up by 7 %.
Ville

Thanks for the plans, my son and I had a great time building them last winter.
We are now having alot of fun with them and looking at building another boat this winter.
Robert
Hi. Here are a couple of pictures of my new dinghy.
Antti

The project turned out better than I could have dreamed.
Tried it today for the first time(using paddles as oars) and the boat performed superbly. A huge step up from the inflatable I was using as a tender.
If you can't read the name it is "Tinybubble" as I am using it as a tender for my 22' sloop "Shybubble". I think altogether it cost me $120.00 (CAN) materials and 10-12 hours of labour to construct. No way I could get the equivalent boat close to this price and effort.
Thank you very much for your plans. I am now looking forward to making another Portuguese, an Eckstock and a mini Aury. I'm thinking about an Opti for my daughter in the future. Winters are long in Canada and I need something to do.
Ron

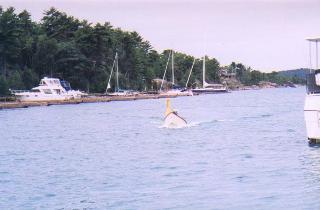
I built the dinghy slightly more buoyant in the stern. Works well with an electric strolling motor, as long as the oars hang in the water to act as rudders.
The oar blades are made of 5" board, the shafts out of two by two. Glued together with epoxy. The oar length is 200 cm, and the oars work fine in a light dinghy like this.
Paavo
Thanks Sir for such fine fine simple to follow plans...this lil boat has been a pure joy...I even attached a trolling motor to it and it responds nicely...i would like to present you with a picture of " lil' fellar "
Mick
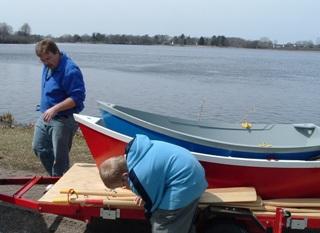
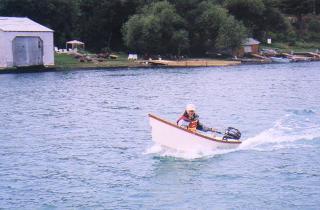
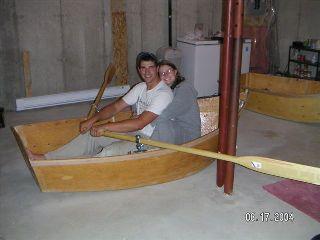
My wife and I are very surprised with how good it looks in real life! In the course of 1 evening I have managed to get the sides put together with the transom. I had some 3/4 inch ply laying around and decided to use it for the transom as I have a small outboard motor that I am going to try with it.
Other then that I am following your instructions as close as possible. You say that it is fine without a skeg but I am going to add one as we intend to tow the dinghy behind our sailboat and I can use the added directional stability in harbours etc.
We just towed our new dinghy 80 nautical miles both under power and sail over the weekend without a problem. We were in some very high waves and except for the occasional slap, I never even thought about the dinghy. As I had mentioned earlier, I added a tiny skeg and I think it helped a little. I managed to use a 20 lb thrust electric trolling motor on high with no problem as well.
It was really fun zipping around the anchorages and having people ask questions. I received a lot of compliments on the boat and a lot of questions. When I told people that I made it in 1 week in the basement, they were very surprised! We loaded it up with myself, my wife and our 2 children and it took the weight no problem. I also managed to do a fair bit of rowing however I did not get around to adding a sculling notch yet, maybe this week. The biggest compliment I received, was one gentleman offered to buy it from me!
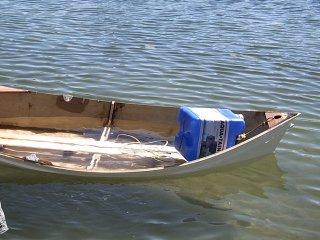
As you suspected the dinghy will not plane. I put a 3 1/2 hp gas engine on it, and try as I might, it would not come up. I finally used my oldest daughter who is 6 as ballast in the front, and although that helped distribute the weight, it still would not come up.
I did not use marine ply or epoxy resin, but used what I had around the house as I was not sure if the dinghy would meet our needs, however over the winter I am planning on building one properly so as to last. This was my first attempt at boat building and in case it did not work out, I did not want to spend a lot of money. Any way, this is the only picture I have so far. It was taken around 6 am as we headed out for our weekend cruise.
Derrick

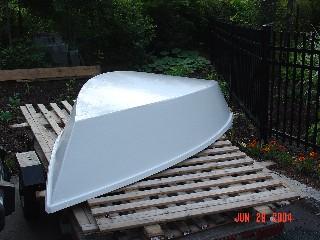
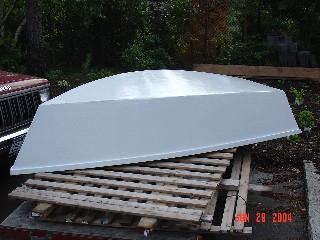
I just finished painting the exterior, all that is left is to paint the interior , secure the oar locks and add floatation foam. I should be in the water this weekend! The paint scheme is not very origonal. I choose white as it was 15% less expensive then if i were to have a color. In any case it does serve its purpose.
Also speaking of lazy. I used a air powered brad nailer to nail the whole boat together. I used 2 inch nails. After the epoxy set I used pliers to pull the nails out. In fact I could not get the all so I just cut them and groung them down.
As my first attempt I am very pleased with the outcome. I choose the "non" conventional seating as it makes much more sense that I can adjust for the center of gravity.
Timothy
This one is not actually about the "Portuguese Dinghy", but anyway...
After reading from your "Simple Dinghy" information I put the lenghtwise seat in this D4 as I was finishing it. Maiden voyage was done about 2 weeks ago. The other short boats we built this winter always had the seat in the wrong place for the boat to balance properly even with only one aboard. The seat is not in the right place when built to the plans. This one works great no matter what the load is. We have been very pleased with it. It's definitely the way to go in a short boat.
I put in only a low frame with gussets on both sides of the frame at the chine and one of the gussets in the center doubles as a seat support. For more strength for the sides I put in an extra layer on the rubrail but it's inside the boat. Maybe that should be called an inwale. Maybe you can see it well enough in the picture. Like I said we've been very pleased.
Evan
The Portuguese Style Dinghy is beautiful. Easy to build and light. Originally I was planning to build a different boat. But when I saw your web page I changed my mind.
It took me about three weeks to complete it working only about 1 hour per night. A few nights I could not work because the temperature was getting a bit low for epoxy. Also, I spent about a week fiddling with pigmented epoxy. Funny stuff that. You can watch it for hours but, as soon as you turn your back it runs and drips onto the floor.
In the end I sanded some of the more noticeable runs off and gave it a coat of 100% acrylic latex house paint. I got it done just in time to catch one of the last warm days of our rapidly fading summer.
The weather here has been showing signs of early winter this year. Last Saturday though was exceptionally warm, sunny and calm. So my wife and I took the new boat to the pond.
I was so excited to actually have nice weather and to get the boat in the water that I didn't fasten the oar locks. As a result, I ended up loosing one. I was standing there on shore feeling kind of sad (more for the loss of the rest of the day than for the oarlock) when my wife grabbed a canoe paddle and jumped into the boat. By setting face toward the bow she was able to get around rather well with just one paddle.
After a short trip and a few moments rocking the boat this way and that, she returned. As she handed me the paddle, she testified that the boat was sturdy and that I could take it out now. Then she climbed up the hill to take a nap in the shade of an old tree.
I wasted no time getting into the boat and had a grand time paddling around the pond. When I was done, I sank the boat! GASP!
I sank it intentionally of course. You see, a while ago I built a D4. One of it's much bragged about features is the three chambers under the seats which can be sealed or filled with floatation to give it positive buoyancy. Since your boat had no floatation, I expected it to head straight for the bottom. I even took the precaution of tying a 7 gallon plastic bottle filled with air to the bow.
I shoved the Portuguese Style Dinghy under and let go. As quick as I did it bobbed back up. The rope on to the bottle was hanging slack. I was amazed. My wife witnessed this from her perch under the shade tree. She is much sharper than I and was not amazed that the boat floated. At least that is what I gather from the fact that she yelled down to me, "duh! wood floats!". You know, I must remember to consult her on my next project.
But I am not the type to leave well enough alone. I reasoned that if it swamped with an anchor onboard or some other heavy gear that it might need more floatation So I squeezed a couple pool noodles through the holes in the extra seat braces that I installed just because I am such a fat bob.
A wonderful boat. I have enjoyed building her. I'm sure we will enjoy her much in the future as well.
Brek
Nebraska USA


Attached is a photo of another one of your offspring. I enjoyed building this, my first full-sized boat. It rows straight without a skeg and is great fun. Construction went much better once I dampened the plywood sides.
The bracket on the transom is for a set of wheels that I slip in and out to facilitate launching and retrieval.
I've also attached a photo of some oars that I built with closet poles and scrap 1x8 cedar (I cut off 1/2 of the poles' circumference on a table saw and attached the blades with epoxy and screws, and wrapped the adjoining area with fiberglass).
Rich
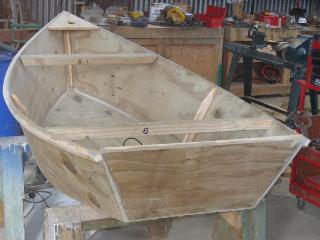
I am in the process of building a variation of your Portuguese Style Dinghy. I wanted something more than the 7'4" dinghy. After some calculations I decided to stretch the sides 16 inches which allows me to get the bottom out of one sheet of plywood. It probably would have worked to stretch it out to 18 inches but I didn't figure that out until after the sides were cut.
After a few months of waiting for favorable weather I've finally finished off the dinghy and took it for a row today. I started the project in the fall and pretty much finished it at the end of November.
I thought I had the final coat of paint on it in November but it was too cold for it to set right and bubbled up in the rain. I did a quick sanding job on it a couple weeks ago and repainted it. Today was the maiden voyage on Lake Washington.
The first thing that I noticed was how easily it rowed and how quickly it would turn if you got out of sync with the oars. The seat placement is really set up for two people so with just me in it the bow plows a little bit and the stern is out of the water. Regardless it felt like a rocket compare to my zodiac inflatable.
Steve
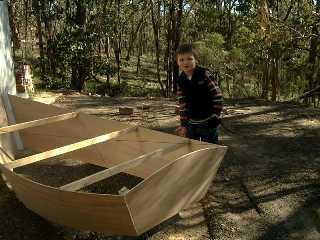
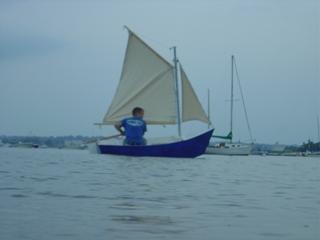
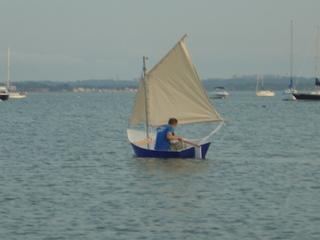
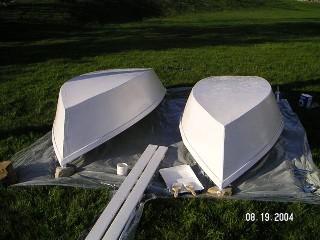
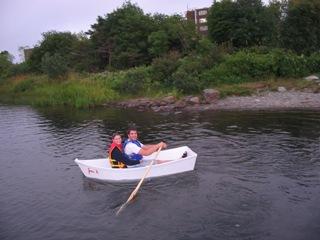
I'm building two versions of the Portuguese dinghy, one for
rowing, one for sailing.
Here's the rowing version on her maiden trip on the home
lake. My youngest son in command.
I did notice, when rowing her, although she is big on the work bench, she is small on the water. Sailing her will be interesting... I had a dog weighing 14 kg (30 lbs) with me in the boat. The dog moving around made the boat heel quite a lot.
This is the current status of the sailing version. The daggerboard box is attached with triangular wood strips. The mast support is a bit of a problem. It should be adjustable to find the correct position, but strong at the same time. I' thinking of an ACA style rig made out of polytarp. Not the best one perhaps, but cheap and easy.
Pasi
Thank you for the boat plans we thoughly enjoyed building the portugese 1 1/2 sheet boat.
Here are a few pictures of the journey including a set back and finally the launch.
Anyway thanks again and I think we are going to try a few more designs yet.
There is a picture here with two people in the boat as you can see there is lots of freeboard and that is with approx. 390 lb.
James & Alex

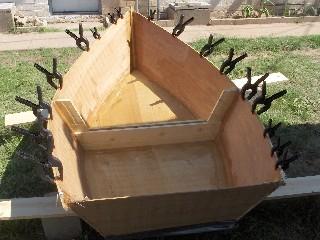
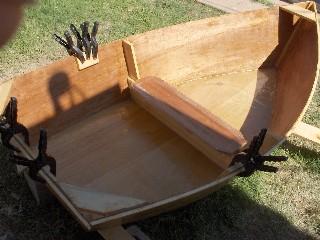
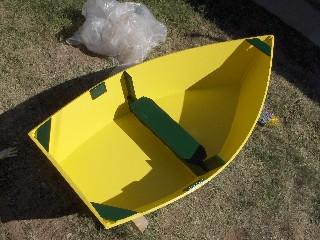
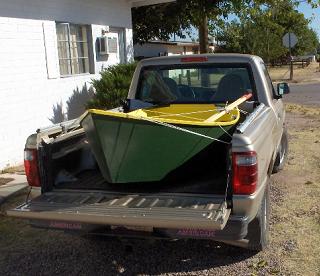
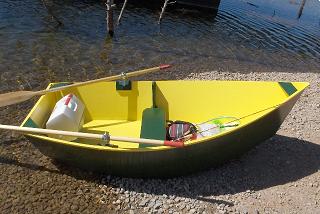
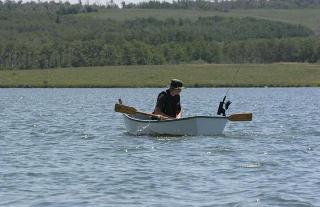
Here are some pictures of my new boat I build from your design. It was very easy to build. I went with a standard seat as I will be the only one using it and I felt it would give me more room for fishing gear.
I left off the skeg as you did. I built a pram some time ago and it had a huge skeg which did nothing but get in the way.
I will see how this works. I did put 4 oz cloth on the bottom as we get some rocks in our little ponds out here in Arizona.
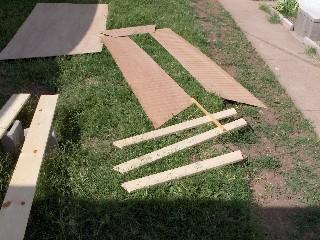
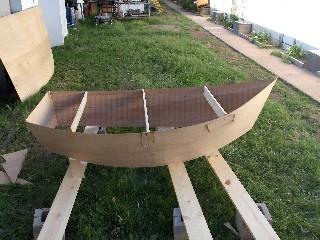
This is the fourth boat I have built and by far the simplest and the fastest. I had the whole thing together in less than a day using only a handsaw and a palm sander.
The clamps I used are from the dollar store as was everything else I used to put this craft together.
Used Canadian Birch plywood which is very thin and light.
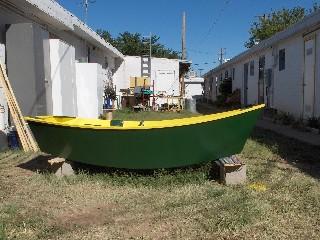
For paint I bought three quarts of paint and primer made by Rust-Oleum. It was wonderful stuff and the best part was it's exterior latex and on sale. This completed boat weighs less than 50 pounds and I can pick it up and walk with it.
Took the boat out to a 133 acre lake. It held all my fishing stuff with room to spare. I rowed clear around the whole lake. Took choppy water like a charm.
This is a winner! VERY easy to row. I was glad I had left the skeg off. If I did my part it rowed just fine... Thank you again. (6 1/2ft oars are just right)
Thanks for a winning design!
Dawne