Bolger Light Dory
History
Construction
On the water
If I were to build another one

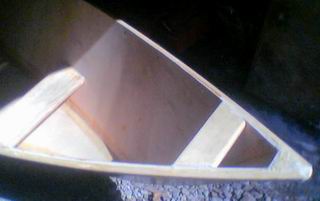
1/10 scale hull model. Straight
grained knotless aspen planks left over from somewhere.
Back to main page.
Prehistory
Must have been more than ten years ago. I came across a book in a public library
(what a surprise?).
The book must have been "Go Build Your Own Boats" by H. Payson.
There were three or four nice designs in the book, a small sailing boat, an outboard
lobster boat and a dory, whose lines caught and pleased my eye. The dory was the Bolger
Light Dory, or Gloucester Gull.
I made a note of the important measurements of the dory. Not many were needed: the
side patterns, three bottom widths and the mid frame measurements.
Then I forgot about the thing.
Recent history
One day I was cleaning my shed and found, not to any great surprise, something
long forgotten under all the usual debris. Two 3 liter cans of something called
"Epitar" epoxy tar.
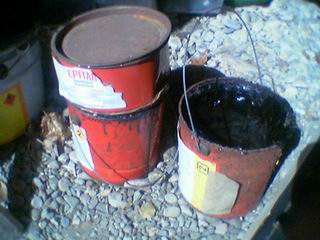
"Epitar" is a two component epoxy mess made somehow of epoxy resin and coal tar,
manufactured by Teknos paint factory.
The stuff is intended mainly to protect underwater and underground metal structures,
but it is also supposed to be extremely abrasion resistant: ice breaker bottoms are
painted with it.
Now there's a good paint for a boat bottom, I though. Tar is traditional (well, pine
tar is tarditional, not coal tar, but You can't get everything), black is
sexy, epoxy has all the good properties.
All I need is a bottom...
Top of the page.
Back to main page.
I returned to the old piece of paper where I had the measurements. (Yes,
I still knew where it was!)
The construction is a basic tape and glue version of the original dory. The sides
and bottom are of 6.5 mm (1/4") birch plywood, the transom is laminated out of two
pieces of ply.
The mid frame, seats and foot holds on the floor, all of pine.
All gluing and filling with West Systems 105/206.
And, of course, wheat flour as filler.
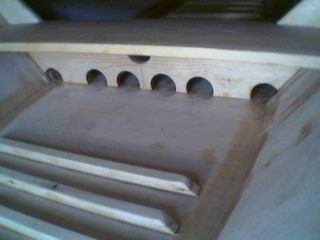 |
Limber holes must be at least this size to be of any use. Smaller holes will be
clogged by leaves falling from trees and other trash. The holes on my frames
were bored with a 64 mm (2 1/2") hole saw.
The corner holes, at the chine, are the most important. When beached, the boat
always leans one way or the other, so the rain water runs along the chine.
It does not, of course, hurt to have holes in the midlle as well. It is good to
have at least some drainage when the corner holes get clogged. (They will, if
You keep Your boat on the beach like I do! If You have a boat shed, well, that's
another thing.)
|
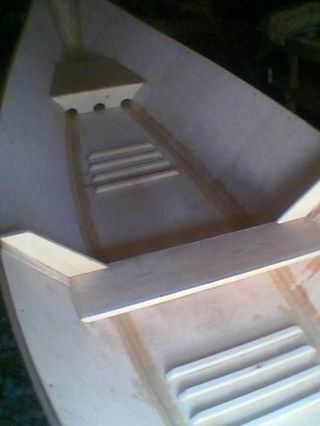 |
I glued the foot holds onto the bottom. Note the strips are narrower than the
bottom, allowing water to run past along the chine.
|
 |
I'm drilling a hole to the transom...
|
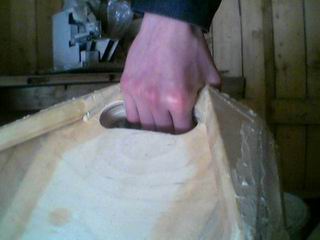 |
...to make a handle.
I'm not going to make a sculling notch, as on the original drawings. The
likelihood of me sculling with one oar is practically nil.
But every time I (or someone else) use the boat, I have to handle,
move, pull, carry, whatever it.
It is so much easier, if there is a handle.
|
 |
The same applies to the bow. It is best to make the breasthook in such a
way, that it serves as a handle as well.
|
 |
The exterior painted with three coats of the afore mentioned "Epitar".
Thinned with acetone.
Hmm...
acetone wasn't according to the instructions on the can... but I couldn't get it out
of the can otherwise. Must have been past the one year shelf life :-)
Well, she's not an ice breaker, either.
|
 |
Ready to go!
The sculls are an old 8' (240 cm) pair I found in the basement.
A leftover from my grandfather.
The oarlock pieces on the sculls are fastened at a 62.5 cm (24.6")
inboard. This, with the spread of 115 cm (45.3"), gives the scull
handles a 10 cm (4") overlap at the middle seat.
|
Top of the page.
Back to main page.
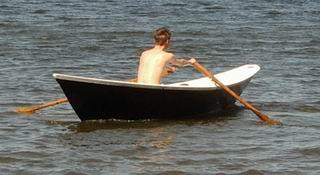 |
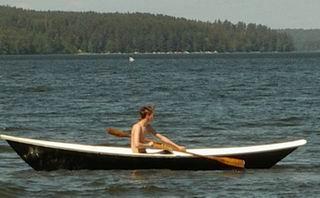
She performs really well. She's light to scull and tracks well.
|
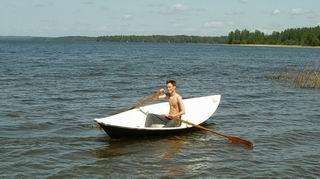 |
Her initial stability is on the lower side. She is so light that
the scullers weight contributes most to the center of gravity of
the total system. This is not to say she's tippy, just don't
try to stand up.
She stiffens when she heels, so she really feels safe.
|
 |
The scull length and the selected gearing feel home.
|
 |
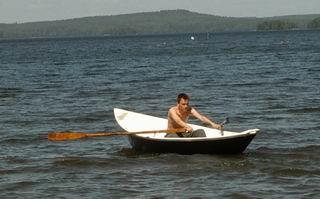
Her side view is really beautiful. Mr. Bolger is a real
artist.
|
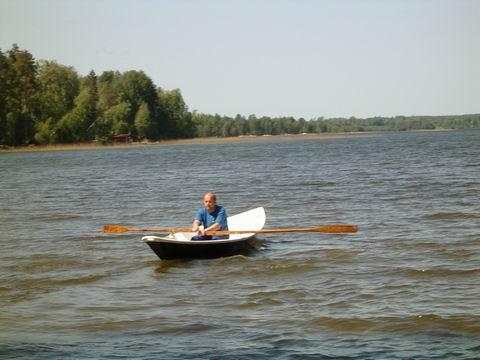 |
If You need a ligh, easy to build sculling boat, this old design
is an excellent choice!
|
Top of the page.
Back to main page.
...I'd admit to myself, that she's a one man boat.
Sculling from the front seat with another person on the
rear seat is not really feasible, at least
not with sculls having fixed row locks. The spread in the front
is much smaller than in the middle, so the scull handles will
have a lot (=too much) of overlap. Also, the rowlock to water
distance is much higher in the front than in the middle, so the
sculls will have a very awkward angle.
And sculling from the middle seat with another person in the rear
sinks the stern too low for it to feel safe.
So I would just leave the front and rear seats out, thus making
the construction so much simpler.
Top of the page.
Back to main page.