
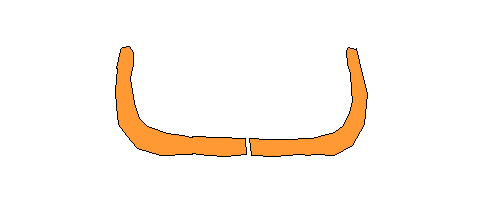
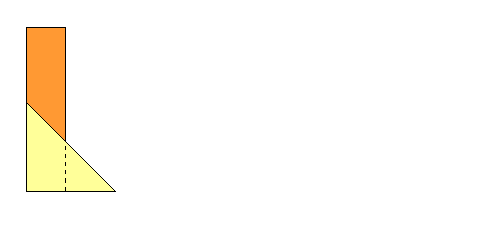
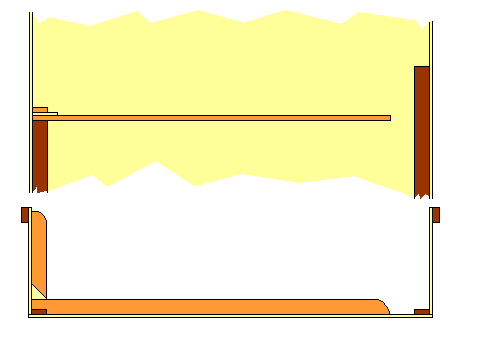
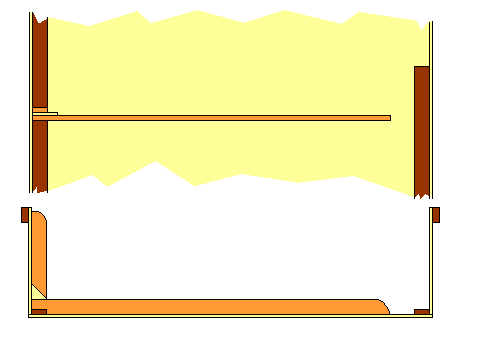
A swamp boat from T. I. Itkonen's article "Flat bottomed boats of Finland" from 1925.
It seems that this boat is equipped with oarlocks and oars.

Whereas this boat is only poled.
I have recently received several queries for plans of flat bottom, shallow draft, minimum fuss boats, that could be poled, paddled or rowed in very shallow lakes or swamps.
There's no need to reinvent the wheel. Or reinvent the box, in this case. Boats like that have been commonplace all over the world where shallow protected waters exist. Before the time of plastics and fiberglass, that is ;-)
Let's apply plywood to local tradition (or is it local tradition to plywood?), and build three slightly different swamp boats, following the lines of original boats from the 1920s and back.
|
A swamp boat from T. I. Itkonen's article "Flat bottomed boats of Finland" from 1925. It seems that this boat is equipped with oarlocks and oars. |
|
Whereas this boat is only poled. |
How did boats like this originally come about?
 |
Archaeological, as well as contemporary evidence seems to show, that wherever waterways and large trees co-exist, dugout canoes have been used at one period in time or another. |
Dugout canoes, however, lack in stability and load carrying capacity. There seems to have been three different paths taken to overcome these limitations.
 |
1 Smaller extra logs have been attached at the waterline of
a dugout canoe to increase stability. |
 |
2 Extra wood was attached to the upper edges of a dugout canoe to increase its
load carrying capacity. |
 |
3 Two logs were attached to each other, and then carved hollow (or first carved
hollow, then attached to each other) to increase both stability and load
carrying capacity. |
 |
The step from two logs to three, or more, is short. |
 |
And a logical step to take, when boards became available, was to replace carved logs with boards. |
And a logical step to take today is to replace boards with plywood.
Although nothing prevents one from making boats like this from boards today, of course. I'd choose tongue and groove boards, if available.
In the following I'll present three flat bottomed swamp boats, all based on models from Itkonen's data from 1925. Each boat can be built out of two sheets of 4' x 8' plywood, and some battens or strakes. Since none of the plywood is going to be bent, the thickness of plywood is not critical. Anything from 1/4" up goes.
The flip side of this coin is the lack of intrinsic rigidity. Curved, edge fastened surfaces of plywood are very rigid and stiff. Flat surfaces are much less so. Because of this frames, gunwale stiffeners and lengthwise runners will most likely have to be installed. But that depends on the thickness of plywood, so some experimenting is needed.
1/2" plywood thickness might be a good compromise between weight and rigidity.
 |
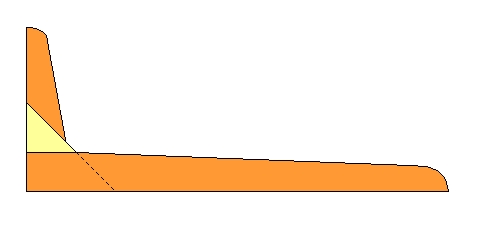
Original boat picture from 1925. |
Note the original L-shaped frames made of naturally crooked spruce roots, on alternate sides of the boat.
 |
Spruce roots were used, since spruce trees have roots flat very near the ground surface. Thus close to right angles to the trunk. |
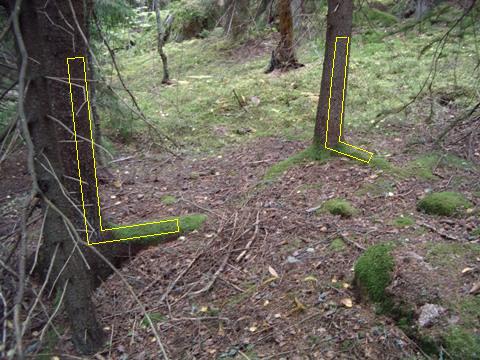 |
So it was easy to make L-shaped frames by taking some 3' of the trunk to make the floor portion and some 1' of the root to make the side portion. |
 |
Acutely angled frames can also be gotten out of spruce roots, by the way. Just pick a tree growing on a steep slope, and You're likely to find suitable roots. |
Using L-shaped frames on alternate sides, instead of U-shaped frames, makes frame dimensioning easy. Frames don't need to be measured just right, almost anything goes.
 |
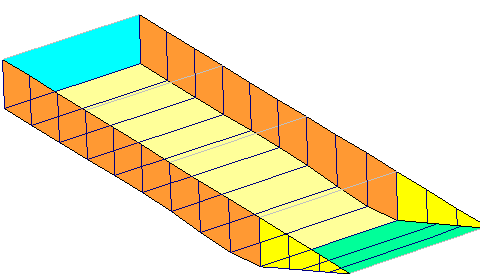
A lines drawing of the original boat. The original was measured to be 3.75 m (12' 6") in length with a 0.85 m (2' 10") beam and 0.3 m (1') side height. Nine L-shaped frames are installed, about 1' apart. |
 |
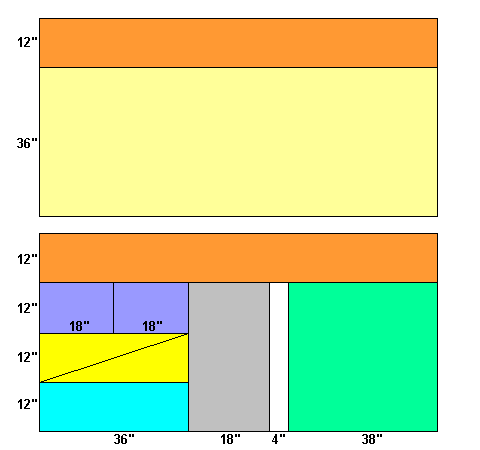
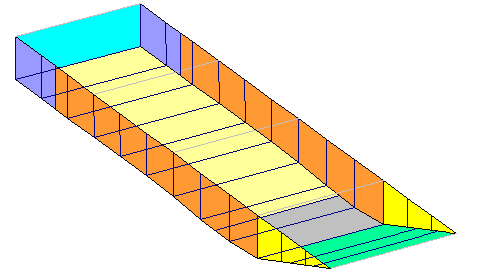
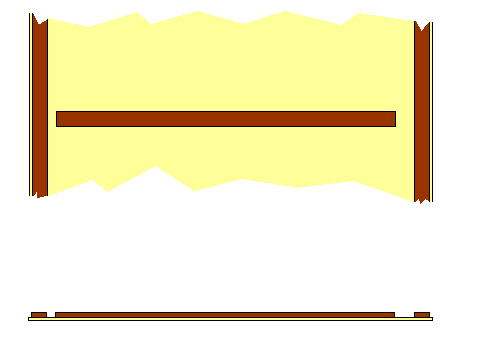
By cutting two sheets of plywood as described here... |
 |
...and reassembling the pieces in this order You get a boat 3.3 m (11') in length, with a 0.9 m (3') beam and 0.3 m (1') side height. |
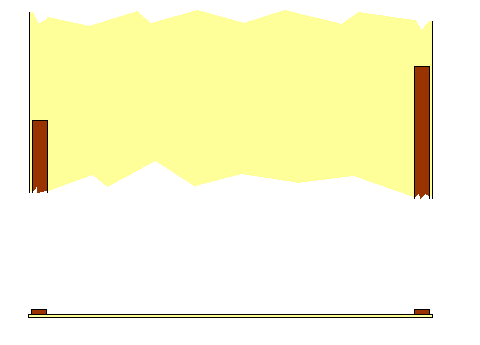
Some of the plywood is left over. The white pieces can be used as bow and stern seats, just like the original above. The pale blue strips can be used for butt blocks and triangular frame gussets.
By taking the white and pale blue areas of plywood in use as parts of the actual boat hull skin the size of the boat can be extended to match that of the original. Not much plywood is left over from two sheets, just enough for frame gussets. Butt blocks and seats have to be made of something else. Also, the number of plywood seams is increased.
 |
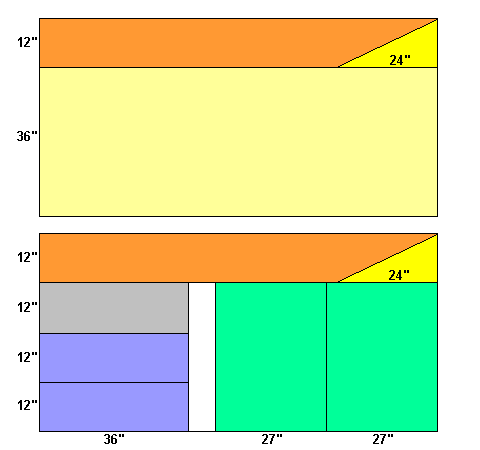
Cut two sheets of plywood like this... |
 |
...and reassemble the pieces. You'll get a boat very close to the original pictured above. |
 |
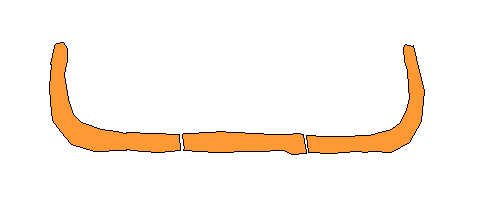
An original lines drawing for a double-ended flat bottomed boat from Itkonen, year 1925. |
 |
Cut two sheets of plywood... |
 |
...and reassemble.
The grain in the grey bottom piece will not be aligned correctly with other
bottom pieces. But what can You do? |
It is very easy to shorten any of these boats by just shortening the bottom and side pieces by the same amount. For instance, leaving the grey bottom piece and violet side pieces away from this 13 ft two-ended boat, and shortening the remaining brown bottom piece by 2 ft, to 6 ft, one gets a two-ended boat of 10 ft total length.
These boats can be assembled using fiberglass tape and epoxy, of course.
And all plywood edge joints can be scraphed.
But since all sides are plumb, and all seams but the one (or two) between the straight and slanting part of the bottom are flat, it might be as well to use simple butt blocks and chine logs.
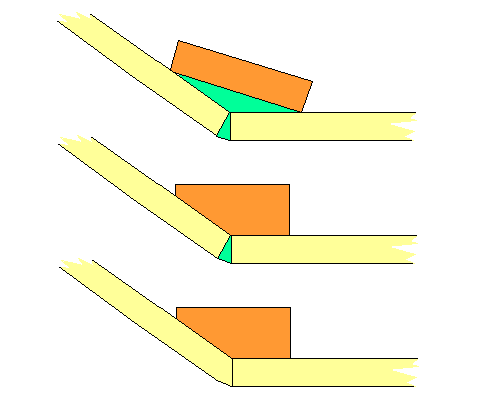
There are three obvious ways to align the plywood edges at the chine log.
Which to choose? It depends ;-)
The point to consider is the vulnerability of the plywood edge. The edge is the place where plywood sucks water in between plies, if allowed. And plywood ply disintegration will start at the edge, in case of mechanical damage.
 |
Side on top of the bottom.
The edge of the side ply is protected. This is the least fuss solution. If You are not going to install runners on the bottom this is probably the best way to go. It would be wise, but not strictly necessary, to use waterproof glue between all mating surfaces. Without glue some leaks will certainly develop. And seal the plywood edges well with glue or paint to prevent water entry. |
 |
Side on the side of the bottom.
The edge of the bottom ply is protected. If You are going to install runners on the bottom this is probably the best way to go. And again, use waterproof glue between all mating surfaces. And seal the plywood edges well with glue to prevent water entry. |
 |
Puttied seam.
Both plywood edges are left unprotected. This approach is possible, of course. It is the standard approach when doing the seams with epoxy and fiberglass. But in case of simple primitive boats like this I'd consider it too much work, too much mess, too much epoxy. |
The L-shaped frames can be built this way. Suitable material would be something like 1/2" x 2" to 1" x 4", or just about anything between these sizes.
 |
Make the side leg about 12" long. The exact length depends on whether You have the bottom plywood between or under the sides, and whether or not You are going to install gunwale stiffeners inside the boat side. |
 |
Glue a triangular plywood gusset on top of the side leg. Use screws or nails to assist. The short side of the triangle should be at least twice the width of the frame material. |
 |
Glue the bottom leg on top of the gusset, at right angles to the side leg. Again, use screws or nails to assist. |
 |
And shape to taste. |
The length of the bottom leg can be about 2' 6" for a 3' wide boat. The point in not taking the frame bottom leg all the way to the opposite side is thus leaving an opening for possible bilge water to flow. With these openings You just might omit any limber holes in the frames.
A sensible frame to frame separation would be about 1'. Since frames are L-shaped, and on alternate sides, the separation between two successive side legs on one side would thus be about 2'.
How to deal with the intersections between chine logs and frames?
One could, of course, go the "proper way" and notch the frames for chine logs.
Or one can take a short-cut, and go the easy way.
Actually, there are two easy ways I can think of.
 |
Where the frames will sit, install cross-wise pieces of the same material that You used for the chine logs. Don't take the cross pieces all the way to the chine logs, leave adequate limber holes on either side. |
 |
Attach the frames on top of the cross pieces and chine logs. Or rather, attach the cross pieces to the underside of the frame bottom leg before installling the frame. Might be easier that way. |
Or do the really unacceptable. Don't use continuous chine logs, but build the chine logs out of short, about 2', stubs. Install frames between chine log stub ends.
The structural strength of the boat comes from the angled plywood monocoque. Not from the continuous chine log.
 |
Attach chine log stubs on either side of the bottom. Note, that the piece on the other side is always the distance of the frame separation, about 1', ahead of the other. |
 |
Attach a frame next to a chine log stub. |
 |
Attach the following chine log stub. |
And so on...
This way the chine logs don't even need to be of the same material from end to end, by the way. In case You want to build a really controversial boat...
 |
There are three obvious ways of making the seam between the straight and slanted portions of the bottom. In addition to fiberglass and epoxy, of course.
|
That's it.
Happy poling :-)