"Simbo", the simple boat
As simple as it can get

This is an easy start for boatbuilding. A very simple 7'4" x 2'8"
boat, made out of
simple materials, using a simple construction method and
just the basic tools.
The design displacement is 230 lbs, that is, one person.
The boat displaces about 900 lbs just before swamping,
so there is room for more cargo at the cost of speed.
But speed can't be the reason for building a boat like this :-)
Here is the .hul file for those
interested.
Material and tools needed
Building "Simbo"
"Simbo" Mk II
Maiden voyage
Back to main page.
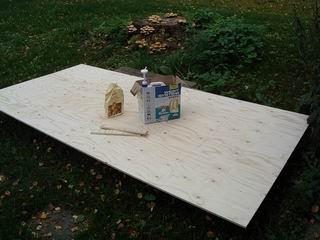 |
Material for the hull:
- One sheet of 12 mm (1/2")
spruce or other light weight plywood.
- A couple of left over
strips of plywood to be used as butt blocks.
- Epoxy resin.
- Epoxy filler (commercial filler, saw dust, wheat flour or
garden chalk powder).
- 50' of glass tape (not showing here). Drywall tape will do in
a small boat like this.
"12 mm, that's thick and heavy! All other small boats
are built out
of 6.5 mm (1/4") ply. Why not this one?" I hear You ask.
12 mm ply is stiff enough to be used without any
extra wooden beefing strips here and there. So weightwise it comes
about equal. But constructionswise much simpler and quicker.
This is a simple
boat, remember. That's why!
But remember also, that many small boats cannot be built out of 1/2"
ply. 1/2" ply is stiff, so it will not bend to tighter curves required
on some boats.
You can, of course, build "Simbo" out of 1/4" ply. But in that case
she will definitely
need some stiffening around all the edges. A 1" x 1.5" pine strip
glued to the outside of sides and transoms will be fine.
|
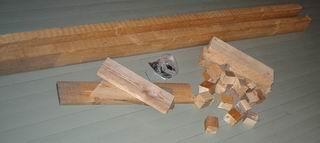 |
Material for a jig:
- Two lenghts of 2x4.
2 m (7 ft) is long enough, if You have longer lengths, don't
cut unnecessarily, extra length doesn't hurt.
- A couple of
brick size blocks of 2x4.
- A couple of pieces of plank, about
20-25 mm (1") thick.
- 22 pieces of 2x2, about 2" in length.
Split pieces of 2x4 are fine.
- Drywall screws, or other thin
screws, roughly 35 mm (1.5") in length.
- Two slightly longer screws,
maybe 65 mm (2.5").
None of these sizes are critical.
"Do I need to build a jig? That's not simple!" I hear You
ask.
I've been quilty for the same mistake over and over again. Trying
to assemble something in the quick and dirty way.
Trying and trying to avoid
building anything that seems "extra", but that would help doing
the job properly and in no time.
Lesson learnt: Build the jig. This is a simple jig, building it
only takes a minute.
|
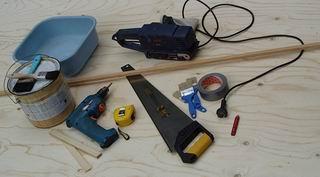 |
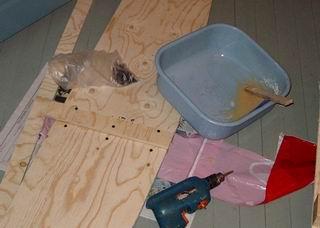
Tools:
- A hand saw.
- A screwdriver (battery powered drill in
this case, but a manual one will do, barely).
- A measuring tape (Buy one
with both metric and imperial measures, life will be so much
easier. You'll never do any more conversions.).
- A pencil.
- Duct tape.
- A batten (thin strip of wood) about 2.5 m (8") in lenght.
- Sand paper (a belt sander in this case).
- Small paint brushes for
smearing epoxy.
- Epoxy mixing container (a flat one).
- Paint.
- Paint brushes.
- Mixing sticks.
|
That's all, lets get to work!
Top of the page.
Back to main page.
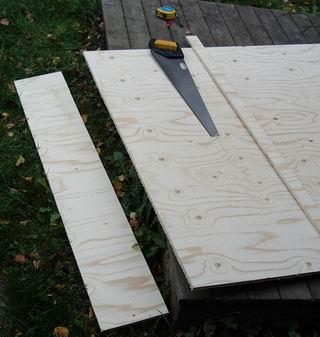 |
Mark and cut a 8" slice from one end of the
plywood sheet.
|
 |
Mark and cut the "Simbo" transoms out of the slice. The
measurements from the edges are 2" - 21 " - 25".
Don't do like I do: mark with a felt pen. I only do so
to show the marks clearly on the photographs (and
they don't show clearly :-(
Instead, use as faint pencil marks as possible. You
don't want them to show through the paint. Save
the two "waste" triangles for later use.
|
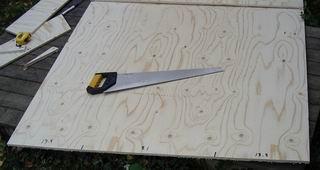 |
Mark both ends of the remaining
plywood at 13.5" -
21" - 13.5".
Mark the middle points of the long sides (44" - 44").
|
 |
Mark the transom end height at the middle of one edge
(one edge is enough) of the ply.
|
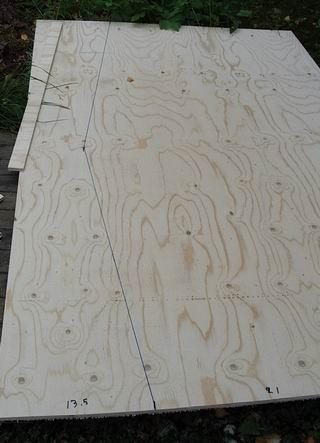 |
Connect the points with straight lines.
|
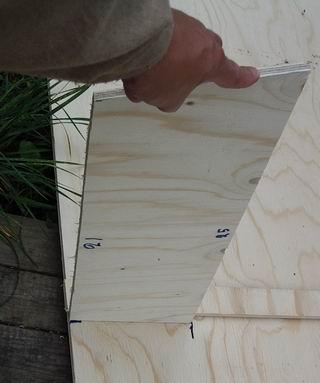
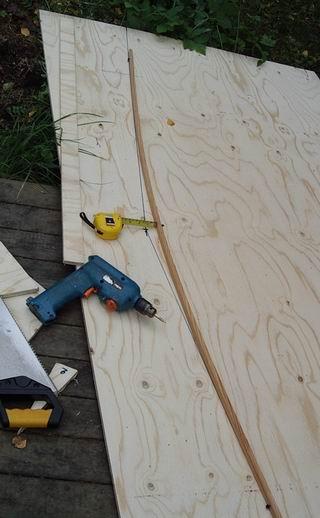 |
Temporarily attach three drywall screws to the ply.
Two at the outer ends of the lines,
one in the middle. In such a way, that the
distance from the batten tensioned between the screws
to the intersection of the lines is 1".
|
 |
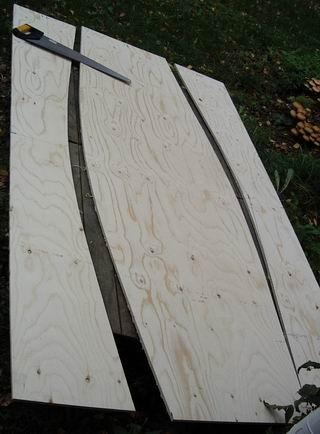
Draw a curve along the batten, not crossing the straight
line at any point.
|
 |
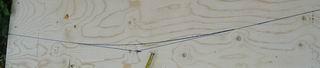
Saw along the curve. A regular hand saw is fine in this, much
better than an electric jig saw. A hand saw is faster and gives
a smoother curve.
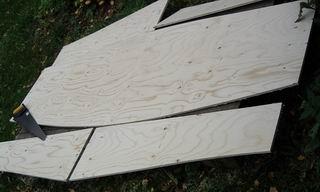
Flip the sawn out side over the uncut edge of the ply.
Draw a line along the cut curve, saw along the line.
|
 |
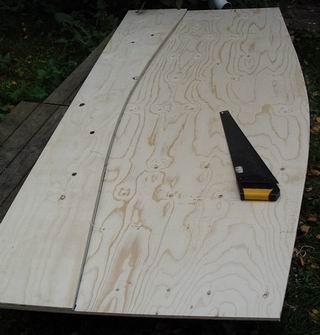
You now have the "Simbo" bottom ready.
Cut the sides in the middle...
|
 |
...and rearrange the parts.
|
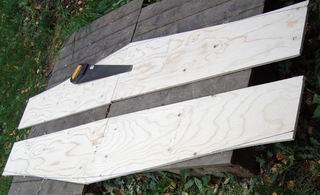 |
Using the bottom as a form, draw the same curvature as the
bottom sides have to the
side pieces, trying to minimise waste. Save the "waste" for
later use.
|
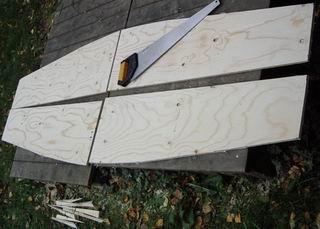 |
Cut the side pieces to the correct curvature.
|
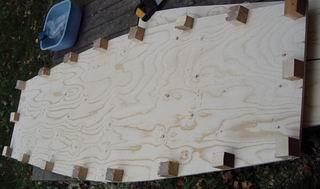 |
Screw 18 pieces of 2x2x2 blocks to the very
edge of the bottom, at about 1' intervals,
from the underside.
|
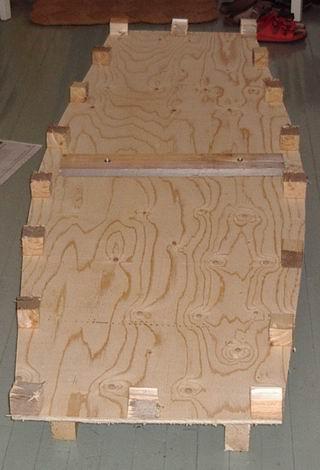 |
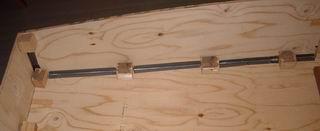
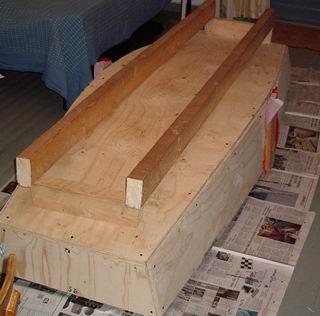
It makes sense to assemble
the jig at this point. The bottom will be out of the way and will
get some pre stressing towards the final bend.
So lay the lenghts of 2x4 parallel, about one foot apart, lay
the bottom piece on top of them, and attach the middle of the
bottom piece
to the lengths of 2x4 using the two long screws and a piece
of plank as a "washer".
|
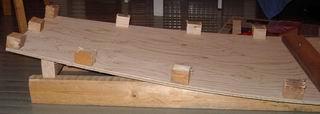 |
Bend the ends of the bottom up with two blocks of 2x4.
|
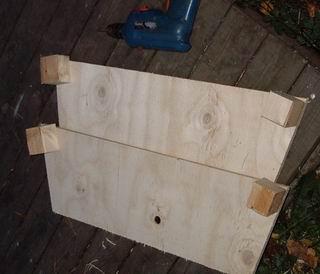 |
Screw the remaining 2x2x2 blocks to upper corners of
both transoms.
|
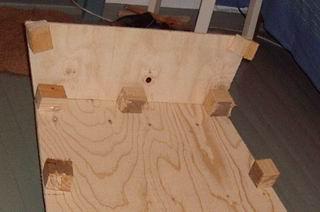 |
Screw the transoms to the blocks in the ends of the bottom.
|
 |
Join the side pieces using butt blocks. The blocks should be
roughly 4" wide, and the height of the side. Cover the outer
side of the seam with duct tape or plastic.
Screw temporarily against a
piece of plank.
Glue pieces of ply 12" from the seam for rowlock attachment,
if You are going to row the boat.
|
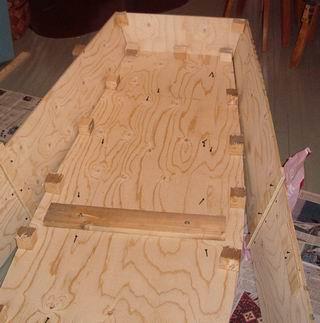 |
Screw the sides first to the upper transom corner blocks in one
end of the boat.
And then to the upper transom corner blocks in the other end.
|
 |
Then proceed along the sides, alternating from side to side, one screw
at the time. If You do one full side in a go You may end up
with an asymmetric hull.
If the bottom curvature seems incorrect
at some spot, wedge it using pieces of plank between the 2x4 jig
and the bottom ply.
If You didn't have the jig You'd be bending the bottom and both
sides, all at the same time now. I think You'd despair.
|
 |
In case the day shines through the seam somewhere, seal
the seam with duct tape. You will soon glue the
seam from the outside, and You don't want the glue to
run to the inside.
|
 |
This is the principle of the seam.
- The bottom and side (yellow) held together with blocks
and drywall screws.
- The seam between the plies filled with thickened epoxy (red).
- The seam covered with glass tape and epoxy (green).
|
 |
Turn the boat over. Wet the seams using a small paint
brush and unthickened epoxy.
Then fill the seams using thickened epoxy (peanut butter
consistency).
Cover the seams with glass tape
and wet the tape with unthickened epoxy.
But don't cover the screw heads with epoxy. You'll remove the
screws later, that's a lot easier without epoxy on them ;-)
|
That's it for today. Less than three hours of effective
working time used and she begins to look like a boat.
You can't go on before the epoxy is
hard. Better not rush it, so wait at least until
the next day.
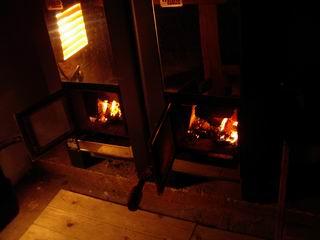 |
What was the slim "waste" from side and bottom curvature
used for, by the way?
To light fire in my sauna stove :-)
|
The next day.
 |
Remove the temporary screws.
Turn the boat over, remove the 2x2x2 blocks, possible duct
tape, butt block holding screws, jig screws, jig.
Sand the boat. Round the edges.
Fill all screw holes with thickened epoxy.
Glue the "waste triangles" from transoms
to opposite corners of the hull
to stiffen the boat. (If You have some waste pieces of
plywood, it wouldn't hurt to have better stiffeners in
all of the corners.)
Wet the inner seams with unthickened epoxy, then apply a bead
of
thickened epoxy to them. And glass tape, like on the outside.
|
 |
Now the seam should look like this:
- The blocks and the screws have been removed.
- Thickened epoxy bead on the inside (brown).
- Covered with glass tape and epoxy (blue).
|
The boat ready, but without paint, in less than five hours of
effective working time.
Depending on whether You are going to
paint the hull, let the epoxy cure. I'm going to
treat the hull with linseed oil, so I just go on with
two coats of oil.
This is not an everlasting solution, however. UV-radiation
will spoil unprotected epoxy, so paint Your boat. I will,
too, once I have tried her out. Or, on second thought, it might
be a good idea to experiment here as well. How well does
linseed oil protect plywood, especially the upper edges?
Simbo resistance curves at 105 kg / 230 lbs total displacement
Rt (violet curve) = total resistance
Rv (red curve) = viscous resistance (friction)
Rw (blue curve) = wave forming resistance
Rh (pale blue curve) = resistance created by transom stern
Full speed scale = 4.0 m/s = 14.4 km/h = 9.0 mph = 7.8 knots
Top of the page.
Back to main page.
The looks of "Simbo" can be improved, with no additional
trouble. Just build the ends slightly slanted. The bow
transom slanting out, stern transom in. The only thing You have
to do differently is to cut the side pieces in two, not with
a straight cut, but with an inclined cut. That's all.
Here finally a slightly more formal presentation of how to cut
"Simbo" parts out of a plywood sheet.
The black measurements are the ones You measure for actual
measurements of "Simbo" parts. The blue measurements are the
ones You measure to centralise things. That is, they have to be
equal in pairs. And finally, the red measurements are the ones
You measure with the transom ends.
The black lines are the ones You cut. The red lines are
auxiliary lines, You draw the actual edges of the bottom using
a batten, like shown above.
And the same in metric.
Here's the slanted end.hul file.
Top of the page.
Back to main page.
 |
Why am I kneeling, not sitting? Well... this is a
"luxury version" of the "Simbo". A couple of beautiful
fountains on the inside to entertain passengers...
Lesson learned: fill ALL screw holes.
But on the other hand, this also shows, that she is not tippy.
If she were, I'd swim by now.
|
 |
This is how much "Simbo" tolerates 200 lbs weight shift.
|
|
The "Hulls" modelling works: the transoms just touch
water. In other words, the initial freeboard is about 8".
|
A very nice little boat, considering the price and effort!
Now I know she works fine. So I can go and paint her.
Top of the page.
Back to main page.