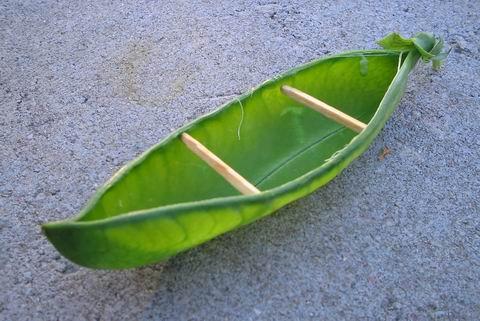
It is pretty obvious, why some boats are called Peapod.
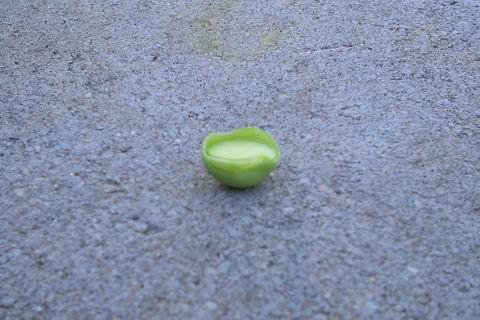
It should be equally obvious, why this boat is called Halfpea.
The smallest dinghy in the world, or should I add,
the smallest decent (well, semi decent, at least ;-) dinghy in the
world.
Free plans and building instructions.
|
It is pretty obvious, why some boats are called Peapod. |
|
It should be equally obvious, why this boat is called Halfpea. |
Wherever You look at requirements for a good dinghy, You'll meet the same dilemma:
The common answer to the dilemma seems to be to build a dinghy with an overall length of 8 to 12 feet (2.4 to 3.6 meters).
In my opinion that's clearly giving more weight to the "as large as possible" requirement. A 8 ft dinghy can under good conditions carry three people, but a 8 ft dinghy is not easy to lift nor store.
Are there examples of dinghies, where the "as small as possible" requirement really rules? Not many and not really. You can find plans for a couple of 7 ft dinghies, some 6 footers and even one or two 5 1/2 footers. But nothing smaller than that, as far as I know.
But there's still plenty of way to go. It's not "as small as possible" before You reach zero length ;-)
Here You have a dinghy, that answers the quest for a very small dinghy.
But remember this! When opting for the small size, one loses on safety, load carrying capacity, seaworthiness, speed (if speed is of any concern in an extremely small dinghy) and directional stability, at least.
This is clearly and strictly a one person dinghy. If You have to carry more people over, use a long line to pull the empty dinghy back across as many times as is required, but don't overcrowd the dinghy.
So if 5 1/2 feet is the smallest available so far, the next size down would be 5 ft. But let's not stop there...
To make the dinghy decent, even if small, let's make her beamy enough
to make comfortable rowing possible. That will be about 4 ft.
We don't want to make the dinghy shorter than her beam. That wouldn't
be "boat like". So let's make her total lenght also 4 ft.
A square dinghy, so to say.
To make some space for the rower's feet and to make the underwater
part of the boat somewhat seaworthy let's make her a shallow v-bottom.
To make her slightly safer than a tin bucket let's make her
unsinkable by incorporating
a buoyancy chamber under the seat.
And let's not frighten people away this time by making her anything but very conventional. No fore and aft seats or anything like that. And no box looks. No, just plain and traditional pram dinghy looks, like most people would expect a dinghy to look like.
Here's the .hul file for this 4 ft dinghy. One could almost think she looks "correct".
The lines A and B mark the positions of the seat support frames again, and the point C marks the beamiest point, where the inside distance between the boat sides should be 1240 mm / 4' 0" 7.
And measurements for one half of the bottom.
The stern and bow transoms. The stern transom has to be cut in two along the line drawn.
And seat frames.


All the actual hull pieces could be cut out of a single 4' x 8' (122 cm x 244 cm) sheet of plywood. Excluding the seat, of course ;-) So actually this little dinghy is a one sheeter and should be displayed in a different section on these pages.
This way to cut would be fine even if the plywood has one good and one not so good face.
But don't cut the parts like this! The sides, end especially the bottom, have to be made of thinner than 1/4" ply. 1/4" ply simply will not bend to the required shape. But 1/4" is suitable for the transoms and the seat, where the parts will stay flat, and a thinner plywood would be too flimsy.
There's almost no room at all in this dinghy. The distance between the aft edge of the seat and the transom is only some 20" (50 cm), so the rower may really have to wonder what to do about his/her legs. A yoga dinghy?
The distance from the aft edge of the seat to the oarlocks should be 12" (30 cm). The oarlocks are almost situated in the corners of the transom. If the dinghy would be just a little shorter, the oars would fall behind the boat :-)

And why the forward swept transom lower part? First remember, this dinghy has very little leg/foot space.
This is what happens in a small dinghy:
The forward swept transom lower triangle is an attempt to take the best of both worlds. In the following curve of areas diagram You can see how the forward sweep removes the sharp discontinuity (pointed to by the red arrow) from the underwater volume distribution curve of this dinghy.
The black curve is from a swept transom, the blue curve from a normal vertical transom. The sharp discontinuity in the blue curve gives a hint of expected turbulence.
The curve is not awfully bad for such a puny boat, imho :-)
And here's the .hul file for the unswept transom dinghy for anyone interested in further comparisons.
 |
This is an interesting set of curves in the sense that it shows the resistance behaviour of a hull that is almost hemispherical in the underwater part. The frictional resistance is minimal, since wetted surface is almost as small as it can be for the displacement. But the wave resistance shoots up at a very low speed. About 1 m/s (2 knots) is the maximum speed You can expect, at any power You can use to propel the boat. |
Rt (violet curve) = total resistance
Rv (red curve) = viscous resistance (friction)
Rw (blue curve) = wave forming resistance
Rh (pale blue curve) = resistance created by transom stern
Full scale = 4.0 m/s = 14.4 km/h = 9.0 mph = 7.8 knots
It's always a good idea to make a cardboard model first. Just to see that the measurements given in the drawings are sensible, and to have a preview of the boat to come. Especially in the case of an extreme boat like this. There's still a chance to back off.
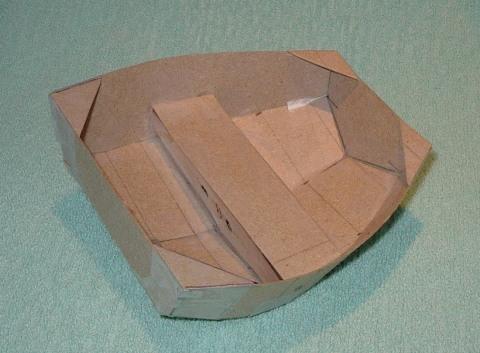 |
This is a 1 to 10 cardboard model of the 4 ft Halfpea.
Hmm... Looks better than I expected ;-) |
But hey. I do have to admit. At this point I did stop to think. Seriously,
id did ;-)
Is there any point in building something as useless as a 4 ft dinghy?
Yes, of course there is! Someone has to do the stupid things in the world.
By doing something
really stupid one pushes the whole stupidity-sensibility scale
up a bit. After this building project, things that seemed stupid yesterday,
may seem sensible tomorrow, compared to this :-)
So, by building a 4 ft Halfpea dinghy I'm increasing the total sensibility
of the whole world affairs. Whey! (Some might
argue, that all I'm doing is infalting the scale...)
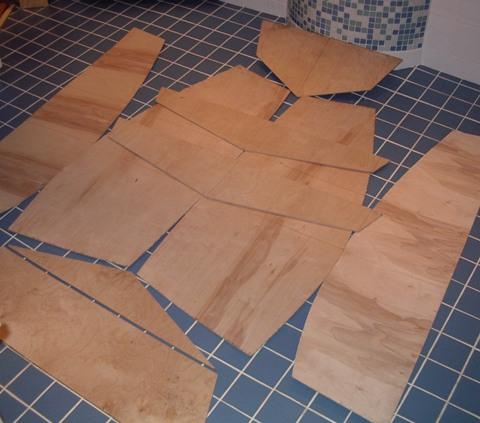 |
First cut the plywood according to the cut pattern given above. I first cut one side and one bottom piece out of 1/4" (6.5 mm) ply, but after trying to bend those I redid the parts in 5/32" (4 mm). Now my transoms and seat are 1/4", sides and bottom 5/32" birch ply. The sides and bottom seem to bend too tightly for 1/4". With some more patience, and possibly moisture and/or heat it just might be possible to use 1/4". (But most likely it wouldn't. Even the 5/32" was tough. ;-) |
 |
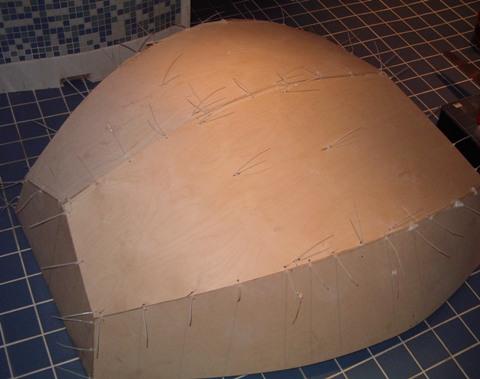
Because the sides and bottom are so bent, I felt the "traditional" (if one already can speak of tradition in stich and glue building techniques) wire clip method of attaching the plywood pieces is most suited to this dinghy. It is easiest to pull all the curves together simultaneously, rather than trying to bend them to final position one by one. |
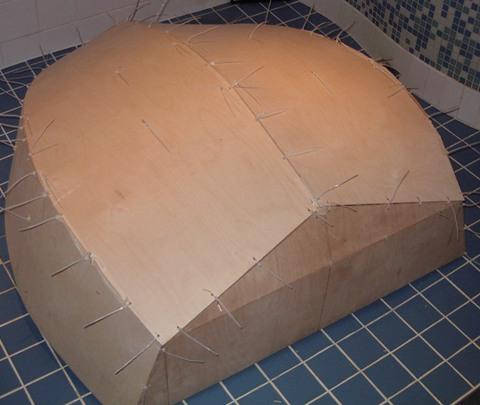 |
At this point I can only say that don't even dream of pulling the plywood pieces together with anything else than wire clips. Three clips for every transom side is a minimum. And a clip every 4" to 6" (10 to 15 cm) along the chine and bottom center line. And do use the "dowel pin trick" decribed on the Gougeon Brohers' pages. It works and it helps. And don't dream of making the bottom and sides out of 1/4" ply. It won't work. |
 |
Don't let her small size fool You into thinking that the ease of building would be scaled down, too. It's scaled up. She's a real bastard to pull together. And don't don't don't pick this little boat as Your first stitch and glue project. You might give up boatbuilding altogether :-) |
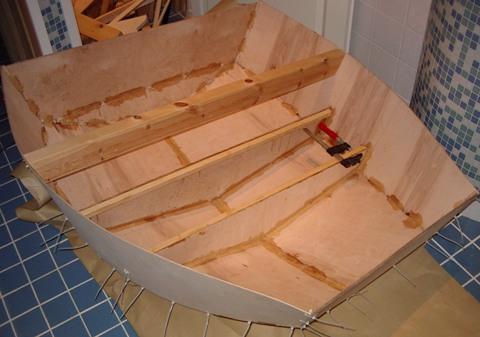 |
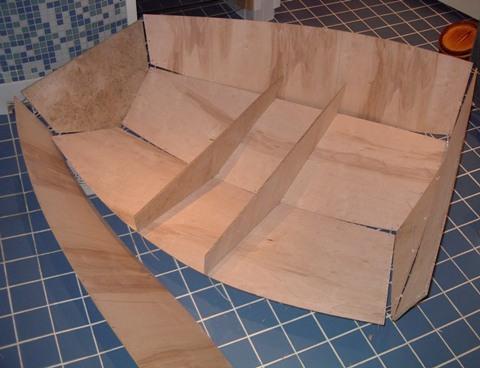
From now on everything is relaxed again. The first blobs of epoxy putty applied to the seams. The crossbar holding the sides apart being made of two by four is no joke. See now what I meant by writing that she was hard to bend together? ;-) |
 |
The gunwale outer strips will be laminated out of two layers of 12 x 33 mm (1/2" x 1 5/16") pine batten. I bent the first strip dry "as is". Or actually two. The first one broke with a loud crack. The second one settled in place, making dubious noices, however. |
 |
So I decided not to go on with dry battens, but soaked the remaining three for a day and night wrapped in wet towels. After soaking the battens bent nicely, I used the hull side as the bending mold.
Why did I not use the hot
air gun method? |
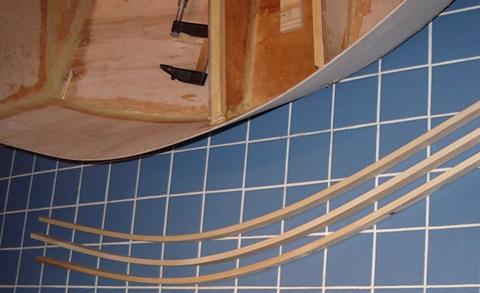 |
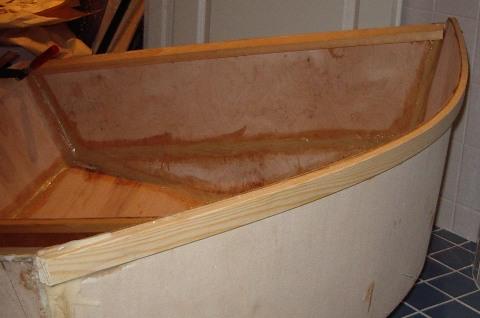
Having dried for three days clamped to the boat the battens had assumed a nice curvature, almost conforming to the curvature of the dinghy side. |
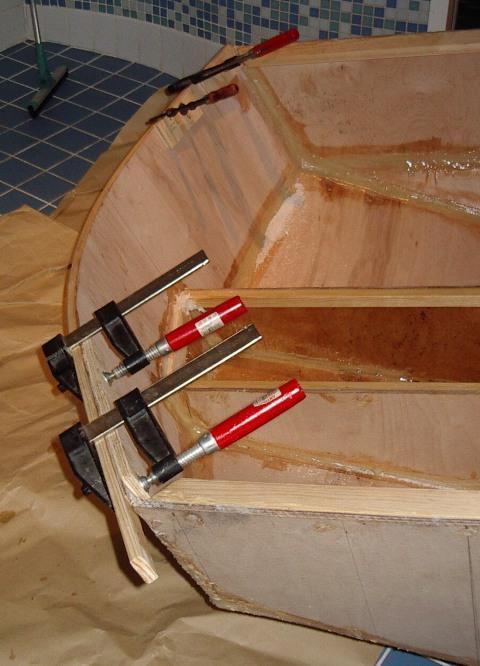 |
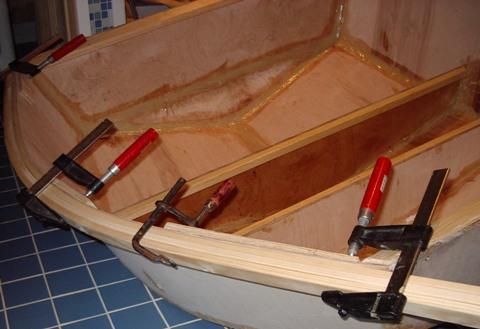
Gluing a pre bent batten to the gunwale was easy now. So why do I glue only one strip at the time? Because the rest of my clamps happen to be at another location at the moment. And it seems to take four clamps to glue one strip. |
The inside of the seat box, as You may see in the pictures above, is coated with epoxy. The seat is going to play the part of flotation in this dinghy. I can think of several possibilities to go about this. The choices to make being:
Expanding those choices to possible seat solutions yields four different seats, each of which has something for them, something against:
Be it this way or that, I'll choose the "empty, closed". I'll coat the inside with three coats of epoxy. Well, some water will condese there one day. Either the epoxy will keep the water out of the plywood. Or if it doesn't, I'm counting on ordinary alkyd enamel paint letting the water out of plywood eventually. And if it doesn't, let it rot.
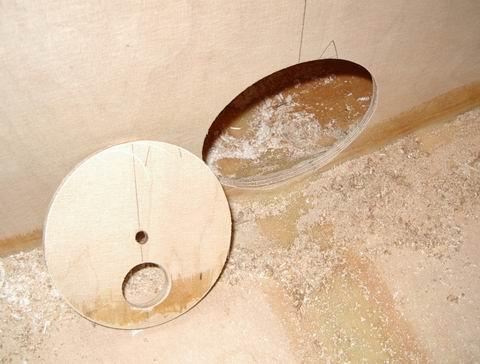 |
That's why I'll also incororate a double inspection hatch in the seat.
|
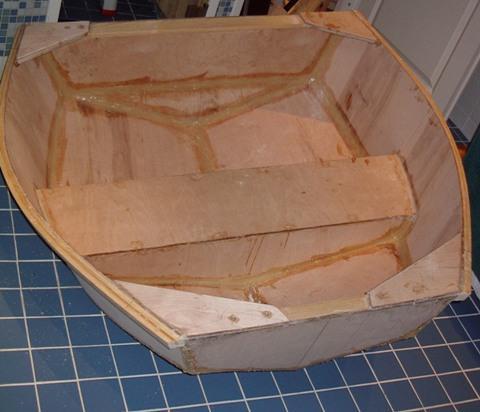 |
The quarter knees are laminated out of three layers of 1/4" plywood. The topmost ply covers the transom cross brace, the two lower layers come to contact with the cross brace edge. The quarter knees have been attached not only with epoxy glue, but also with screws through the gunwales from the side, and through the top layer of plywood to the transom cross-member from the top. |
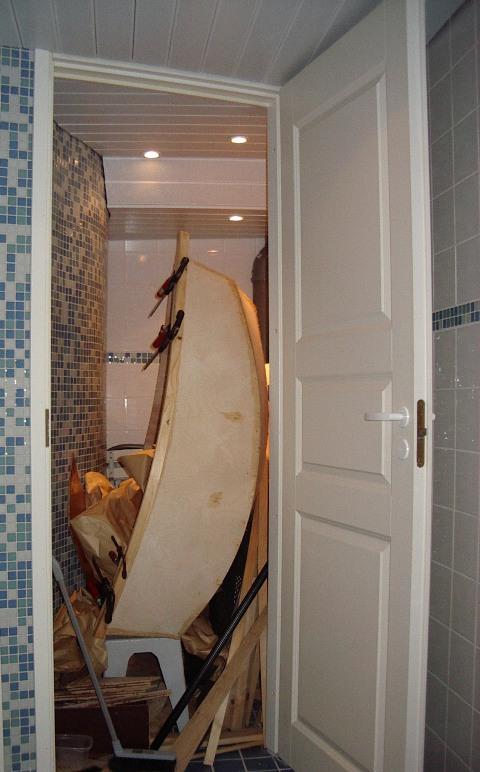 |
A definite benefit of a boat as small as this is, that it can be stored in the "junk closet". Keep up the domestic peace, You know ;-) |
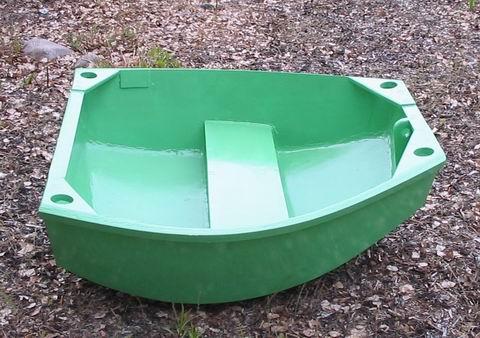 |
Halfpea completed, painted pea color. I wonder, are there any other boats in the world painted pea color on purpose? |
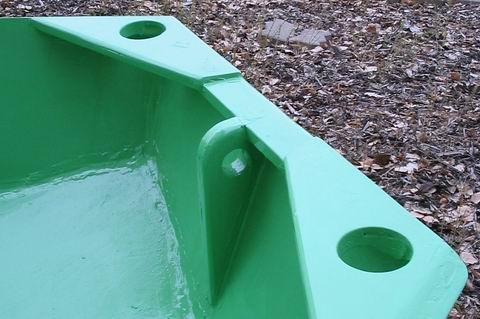 |
All quarter knees have "my standard" 2 1/2" holes, to act as a handle, or to tie a rope. A painter "ring", constructed of four layers of 1/4" plywood laminated together, is attached on the inside of the bow transom. The attachment is on the inside both traditionally, and on the other hand it prevents the need of ever having to lean over the bow to get hold of a painter that slipped overboard. A pure safety feature, that is. |
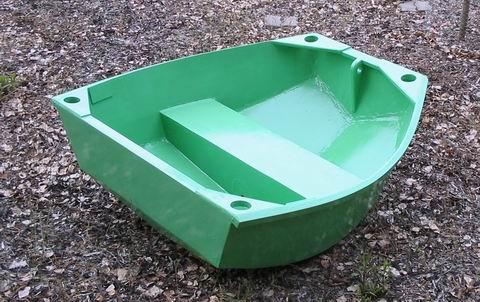 |
The complete dinghy does not need to be ashamed of herself. The diminutive size is not obvious in the picture. Before the maiden voyage Halfpea needs oarlocks. The oarlocks need to be of a type, that keep the oars locked onto the boat even if You pull slightly upwards on the handles (more of this later...). |
I designed and built Halfpea quite with my tongue in cheek. This was supposed
to be just a practical joke of some kind.
But the joke turned out to be on myself. Halfpea is not just a joke
as a boat. But a touching little boat, almost to be taken seriously
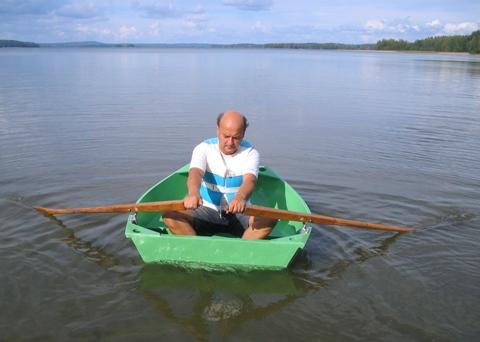
(but not quite, maybe ;-). She is surprisingly easy to row, and
incomprehensibly stable for her size.
 |
Viewed from behind Halfpea looks like a bigger boat. This was the meaning. She was supposed to be beamy enough to use decent oars. And as You can see, my legs fold quite easily into the boat. No yoga needed. |
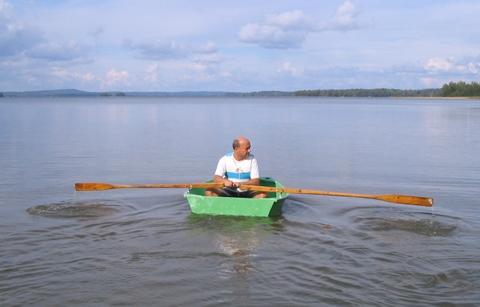 |
And by decent oars I mean decent oars. Not any horrible 5' plastic or aluminium toys. These oars feel quite at home. 8' wooden oars, that overlap some 4" at the handles. A very boat-experienced friend of mine said, it's the first time he sees oars twice the length of the boat they're on. Well, he just hadn't seen everything... |
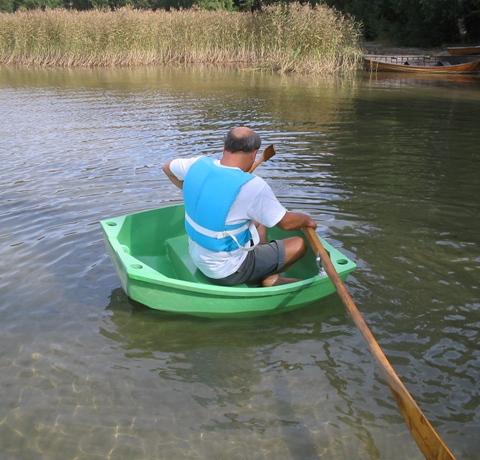 |
A side view is needed to get a grasp on how small the boat really is. |
And since You don't, after all, believe that Halfpea can be rowed easily, download here a Halfpea rowing video clip (8.8 Mb) and see for Yourself.
Halfpea is a slow boat. With the waterline lenghth of some 44", the calculated hull speed is around 2.6 knots. So it's no use even trying to row faster than a lazy walking speed.
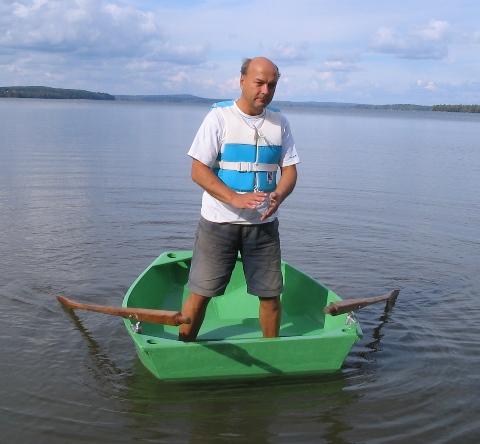 |
As written, Halfpea is stable for her size. I'm no acrobat, but I can stand up in the boat. At least on a flat calm day ;-) |
And some more insight to Halfpea stability on this video clip, rocking the Halfpea (5.2 Mb).
Well, she may be stable in calm water, but how about waves? There are waves on this beach only during hard northern winds. The beach is shallow, the waves grow steep.
When autumn comes, so come the northern winds. To the beach then...
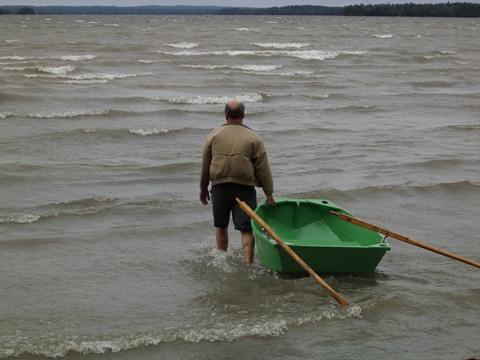 |
Judging by the waves, and how trees bend, the wind is hard. The waves are about as big as You get on this beach. Although they look really flat on the photo :-(. The open water spans some three miles, so no zunamis here. But look at the way my jacket bulges! |
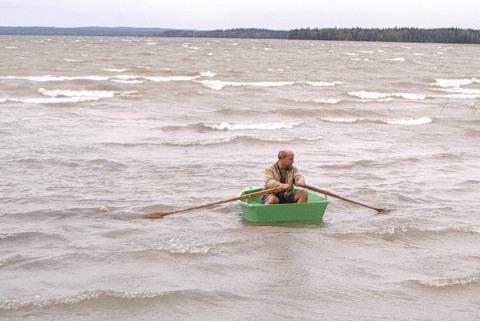 |
Against the wind, against the wind... |
At this point the camera batteries ran flat. Well and good.
The photographer didn't get a shot of how one of the oars jumped loose
from the oarlock. As I was pulling hard, I fell on my back against the
bow transom. Halfpea rocked forward, and took in a lot (compared to
her size, that is ;-) of water over the bow. Had I not been playing in the
shallow water, I would have been in so called trouble. Now I was just
soaking wet.
This is why the oarlocks on Halfpea must be such, that the oar cannot
jump loose even when pulling hard and/or upwards.
Out of the boat, bail the boat by turning her on the side, and out again. If the rower stays on the seat, Halfpea just manages waves like this. Steep waves in shallow water tend to throw a lot of spray over the bow transom, so it's a wet ride going against the waves. Going with the waves is more pleasant, however.
These kinds of waves are absolutely too much for the safe use of Halfpea. The boat must not be used in waves like this, nor during a wind like this.
Athough it's bloody fun ;-)))))
Maybe this could be used for something useful!