Two Dories
Free boat plans and building instructions
Aching back, sore hands
The Solution
Little Sister
Big Sister
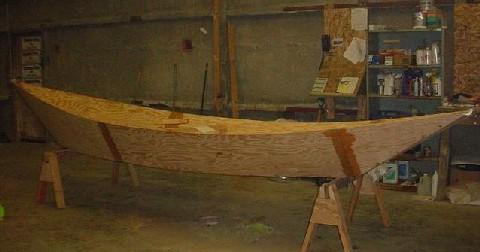
Building the Big Sister
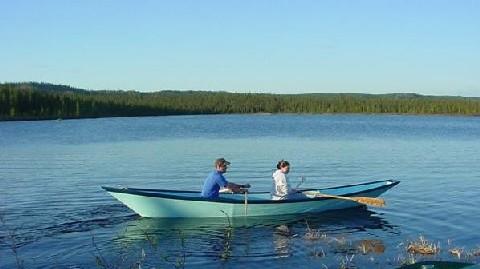
The Little Sister Dory in action. Only three sheets
of plywood.
Back to main page.
Dories again? There are already 1017 of them out there.
So what's new?
Nothing. But in a new combination. But let's start from
the beginning.
I have built some small boats up to now. Building
a boat is very pleasing in many aspects, but why was
there always something wrong after building one? My back
was sore, my hands full of blisters and small woulds.
I made an analysis of the root causes of problems I
had experienced, and it boiled down to this:
- I don't have a proper, roomy woodworking workshop. This
is the biggest problem, and the root cause of some other
problems. But I can't do anything about that. So getting a
workshop is ruled out from the solution list.
- Leaning over the side of the unfinished boat,
into the boat, gives the
aching back.
There are several phases in boatbuilding that involve
just the damned leaning over:
- Gluing and taping the chines (in taped chine
construction).
- Filling and sanding the chines.
- Fixing the seats and other "furniture".
- Painting the inside. This is the worst by
far. The inside should be painted over at least
four times. Every time reaching into every
hidden corner and under every seat and shelf.
And the paint job duration is the longest.
Easily two or three times the duration of the
woodworking part.
Pain job, not a paint job.
- Take a couple of loose fibers from a glass tape, add
epoxy, let it harden. What do You get? A bloody sharp
invisible needle! Oh, I hate them, I hate them, I hate
them! There's always one left wherever I stick my finger
to.
Then there are the things, that are not "real problems",
but what I would call "difficulties":
- A tape and glue seam is easy to make?
No, it's not!
It's easy in the sense that in the end anyone can make a
good looking seam without special tools. But it's not easy
in the sense that it would be a quick, pleasing and clean
operation. Instead, it's messy, involves many, many steps,
that cannot be performed in one go, and is potentially
allergenic. And also, it involves the glass tape (and hence
the bloody invisible needles), that doesn't really go
so well with a wooden boat.
- Bevelling anything (such as frames, stems, planks
etc.) accurately is difficult without a good work bench.
A piece of
wood to be planed should be held solidly. When it's
not, it usually results in broken skin on the knuckles.
- Wood is expensive. As much as possible should
be achieved from as little as possible.
- Epoxy is even more expensive, so as little as possible
should be used.
- Lofting is error prone (and many people find it
difficult).
- Anything curved is more difficult than straight.
The design requirement is crystal clear: "Design a boat
to overcome these problems and difficulties".
Top of the page.
Back to main page.
Reading the history of the
"Lowell dory"
provides a
great deal of the solution. They already did part of the
job. A dory is not popular only because of the seaworthiness,
it also gives a very favourable "good looks" to "amount
of work" ratio. It's basically very cheap to produce.
So the plan to solve the problems and difficulties turned
out to consist of the following incredients:
- Make it a dory. It looks nice, but consists basically
only of four flat parts, so is very easy to make.
- Make the sides out of plywood. Easy cutting, strong,
watertight.
- Design the side pieces in such a way,
that as much as possible of the gunwale edge of the piece
is straight. The edge of the plywood sheet can be used uncut.
The easiest part of work is the one You don't have to do at all.
- Make the bottom out of tongue and groove planks intended
for house flooring application. Why this?
- Planks: You can nail the side plywood to the
edge of the bottom planks, just like they nailed
the garboard to the bottom planks of dories before
the time of plywood. Thus get rid of the glass tape.
And note: nailing is done from the outside, no leaning
into the boat!
- Tongue and groove: Easy to level the planks,
reduce the risk of leaking seams.
- House flooring: This is the most widely used
type of planed
tongue and groove planks, so also the cheapest.
And also comes in suitable sizes.
- Bevel the edges of the bottom. Now how does this go with the
difficulty of bevelling I mentioned above? It is the lesser of
two evils. Either You bevel the edge or You fill the gap between
the bottom plank and the flaring plywood side. I'd rather
bevel than fill from inside the boat, but that's a choice anyone
can take for themselves.
- When bevelling the bottom, overbevel slightly, and fill the
seam from
the outside. That way You don't need to be overly accurate with the
bevel.
 |
The plywood side (grey) nailed to the overbevelled bottom (yellow).
The seam then filled with epoxy filler (red).
|
- Make the transom out of the same planks. Slightly overbevel
and nail. The same comments
apply.
- Make the seats detachable, so they can be painted outside
the hull and attached when needed. An extra bonus: seats stay clean
if You don't store them in the boat.
- Make the seat supports in such a way, that they can be
attached to the sides before the sides are attached to the bottom.
No leaning over the side, again.
 |
But what should the seat supports be like to be as simple as possible?
Of course, the simplest/best solution to any problem is "get rid
of it altogether". This solution dawned to me one night while reading
the excellent "Ships of the Pharaohs - 4000 Years of Egyptian
Shipbuilding" (and mind You, it starts from 4000 BC)
by Bjorn Landstrom. Simply cut a rectangular hole
in the side ply, and glue the seat end into the hole.
|
- Connect the plywood sides in the bow by nailing into a
bow stem, instead of using any glass. A suitable size for the
stem to start with would be 2" x 3".
- Make the bow stem straight. A curved stem might look a bit
better, but at the cost of a lot of extra lofting and curved
cutting.
- Dig up Your buried axe. A smallish SHARP axe is an
excellent and quick tool for bevelling. And surprisingly
accurate too. At the bottom and bow stem jobs an axe beats
a hand plane 6-0.
- Don't paint the inside of the boat. Instead, treat it
with the traditional linseed oil - pine turpentine - wood
preservative mixture. The mixture runs almost like water, so You
can just "splash it around" with a big, soft brush
with a broom stick handle. And then let the extra run to
a container
through the drain hole.
- But paint the outside. That way You can hide pencil marks,
filled seams and nail heads with minimum labour.
Also, durability may be better
with the outside painted.
Two designs evolved to test the "solutions" presented above.
The "Little Sister", that can
be built from two sheets of plywood plus the bottom planks, or
alternatively out of three sheets of plywood. And the "Big Sister",
sides out of five sheets of plywood, the bottom out of planks.
Top of the page.
Back to main page.
The Little Sister design is basically just like any 18' x 4'
(5.5 m x 1.2 m) banks type dory.
She is based on the deign criteria presented above, and also on
my slight disappointment of the
"Bolger light dory".
One must be able
to get more boat out of two sheets of plywood: longer, for two
people, with more buoyancy in the stern.
This .hul file gives You the basics.
The recommended cut pattern yields the sides out of two sheets
of 6.5 mm (1/4") or 9 mm (3/8") plywood. Both sides consist
of three pieces. Butt blocks
to connect the pieces are made of 4" (10 cm) wide strips
sawn out of the left overs.

The measurements for the chines (mm):
The bottom and transom can (I would!) be made of planking,
but also of plywood. One sheet can be cut along this pattern.
The plywood transom would consist of two laminated layers.
The measurements for the bottom and transom (mm).
The bottom is symmetric, so the same measurements apply for
both the bow and stern:

If the plywood to be used has only one good face You
might be better off using this cut pattern.

A couple of small details to notice:
- The side pieces have a straight upper edge.
- Because of the straight edge a gunvale strip only
needs to be bent in one plane.
- The bow is straight.
- The stern of the bottom and the lower end of the transom
narrow to a point. This makes for easier measurements and
a stern exit as narrow as possible.
- The bottom would be easier to make if it was flat. But
with a slight rocker it is stiffer.
- The length and beam are dictated by the size of two
sheets of plywood. Getting past the usual 15'-16' length
is worth (imho) the extra butt seam close to the transom.
Three seats could be installed. A single person sculling
would scull sitting on the mid seat. A single sculler
with a passanger would scull from the front seat, with the
passanger on the rear seat. The front and rear seat positions
assume a 90 kg (200 lbs) sculler travelling with a 65 kg
(140 lbs) passenger. With a heavier passenger it would be wise
to move the rear seat towards the bow.
The seat positions have been selected to give almost equal
spread of the oarlocks on both sculling seats.
Resistance curves of Little Sister at 150 kg / 330 lbs total displacement
Rt (violet curve) = total resistance
Rv (red curve) = viscous resistance (friction)
Rw (blue curve) = wave forming resistance
Rh (pale blue curve) = resistance created by transom stern
Full speed scale = 4.0 m/s = 14.4 km/h = 9.0 mph = 7.8 knots
Top of the page.
Back to main page.
The Big Sister design is a 19'5" x 5'6"
(5.9 m x 1.6 m) banks type dory.

Based on the design criteria presented above, with the
ability to carry at least three or four people.
This .hul file gives You the basics.
This cut pattern yields the sides out of five sheets
of 12 mm (1/2") plywood. Both sides consist
of three pieces. Butt blocks
to connect the pieces are made of 4" (10 cm) wide strips
sawn out of the left overs.

The measurements of the frames and transom. These are for the lower bow version (see below). For the higher bow version just extend the sides of frame A by 100 mm, and finally cut flush with the gunwale.
The measurements for the chines (mm). Two possible ways to cut
the plywood at the bow are displayed. The frame loactions
are marked in blue.
- The one shown in all the figures on this page, and in the
.hul file, giving a lower and shorter bow, but requiring a
curved plywood side.
- The straight plywood alternative (in bright yellow),
giving a slightly higher
and longer bow. This alternative gives a hint of South East
Asian fishing vessel look, which, imho, is quite nice.

The bottom and transom are made of planking.
The measurements for the bottom and transom (mm). The frame loactions
are marked in blue:

Here are the frame locations for the "low bow" version.
And frame locations for the "high bow" version.
The frame top widths are equal in both cases.
Here are the locations of the frames and "seat holes" relative
to the plywood sheets. The measurements are based on measurements
taken from a cardboard model.
To my great surprise it seems that the "seat holes" are
more or less in
line with the straight edge of the plywood.
The sizes of the holes depend on the final seat lumber. The
measurements given are for the seat edge and seat top.
Resistance curves of Big Sister at 180 kg / 395 lbs total displacement
Rt (violet curve) = total resistance
Rv (red curve) = viscous resistance (friction)
Rw (blue curve) = wave forming resistance
Rh (pale blue curve) = resistance created by transom stern
Full speed scale = 4.0 m/s = 14.4 km/h = 9.0 mph = 7.8 knots
Top of the page.
Back to main page.
I'm planning to build a prototype of the Big Sister in
due time. (That is, once I have finished about a dozen of
other projects.) Here are some preliminary thoughts on
building, however. I'll update them while I think more :-)
Lofting
There are three curves that need to be lofted. The edge of the
bottom, and the lower edge of the side and the front
of the upper edge. Do the side first.
The boat is going to be painted on the outside, oiled
on the inside. So the wood on the inside should be nice and
clean, without holes or dents. For that reason, select the
better side of the plywood to face the inside of the boat.
Stack the plywood sheets with the better sides facing each other.
That way they are protected and your pencil marks will
come to the outside of the hull.
Mark the following points on the plywood.
Connect the points.
Jigsaw both sheets in one go along the lines.
Assemble the bottom planks for the first time. Don't get
any bright ideas of gluing them at this point!
Work on the side that is going to be the exterior. If
possible, try to orientate the planks in such a way, that
the heartwood faces the outside as much as possible. Each
plank will be nailed to each floor timber by one nail in the
middle. When planks get wet, they will now curve in such
a way as not to pull on the nails.
Draw a line or two across all the planks in the middle of the
bottom, mark the bow - stem direction on each plank,
and number the planks, so You can re-establish
the plank positions even after they have been separated.
Draw the bottom edge curves onto the planks.
Prefabrication
Work with as small as possible pieces for as long as possible.
Now You don't want to work with the whole bottom at once,
it's heavy and clumsy, so separate the planks.
An ordinary hand held electric jigsaw does not work well with
planks when cutting at small angles to the grain. The grain
tends to tell the blade where to go, You have no control. So use
an ordinary hand saw. Make just straight cuts as close to the
line curve as You can.
Fair the curves with a sharp axe.
Draw a line at a distance xxx times the plank thickness from
the faired curve on the underside of every plank end.
Bevel the plank ends up to this line with the axe.
Now the bottom can be reassembled. There will be three
floor frames, straight pieces of plank, on the bottom at
this point.
Nail the planks to the frames
with annular ring nails. Use only one nail per plank
at each frame, thus alowing the plank at least shrink freely.
Boat bottom ready.
Top of the page.
Back to main page.