One Sheet Boat, the Prism
Free plans and building instructions

What is a one sheet boat?
Some basic shapes and a little "theory".
The Prism, plans and instructions. Simplicity is her second name.
Building the Prism, pictures of the prototype.
Prism maiden voyage.
Theme with variations.
Box Prism.
One sheet kayak.
Short and fat, the ultimate one sheet boat, with capacity for up
to three people!
Back to main page.
A boat made of just a single standard sheet of plywood
(The "standard" standard, 48" by 96",
or 122 cm by 244 cm. There are other standards too...)
If the transoms, sides or any other parts of the hull are made of
something else, the boat is not a one sheet boat, but something else.
Chine logs, rubrails, internal frames, butt blocks, seats etc. may be made of whatever
You like, but not the actual hull enclosure.
Basic one sheet boat design criteria:
- make it carry as much load as possible
- make it look like a boat
The load carrying capacity is connected to the maximum displacement of the
boat (displacement just before swamping), or the maximum enclosed volume, if You like.
So make the thing as big as possible.
But what makes a boat look like a boat?
If You make it:
- longer than it's wide
- wider than it's deep
- tapered in at least one end, in at least one plane (horisontal or vertical)
- throw it into water
- and it floats
then most people will probably call it a boat.
Top of the page.
Back to main page.
Ok, let's design a one sheet boat!
Hint:
Get Gregg Carlson's excellent freeware Hullform hull design software now, if You don't
have it already (You'll
find it on the Links page). Hullform will enable You to view the .hul files provided
on this page.
A round coracle
The surface area of a standard plywood sheet is 4608 sq. in (48x96).
The maximum volume "boat" that could be made out of that area would be a hemispherical
bowl with a 54" diameter. Quite like a Vieatnamese basket boat or a coracle!
This coracle would have a maximum displacement of 1500 lbs (680 kg),
and that would be the absolute maximum displacement You could get out of a single sheet
of plywood.
A bowl like that might not be an ideal boat and not too easy to build
either (Oh why not? Just cut the plywood into lots and lots of small polygons of various
sizes and shapes and glue them together ;-).
A square box
The next obvious shape comes from squaring the round coracle into a 4'x4'x1' box.
The plywood cut pattern
is easy this time and we get a maximum displacement of 997 lbs (453 kg).
But no boat looks whatsoever.
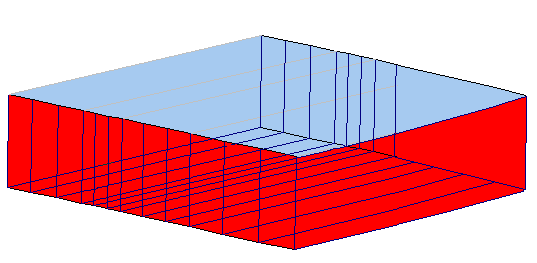
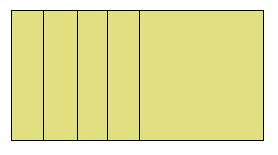
Square coracle .hul file.
A square barge
A little more boat looks (but still very little) by stretching the box to 7'x2'x1'.
Cut pattern is easy, maximum displacement 872 lbs (396 kg).
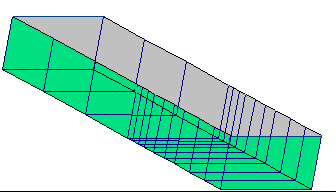
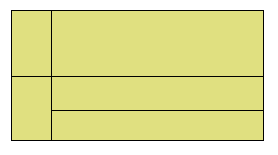
Square barge .hul file.
A punt
Again a bit more boat looks by tilting the transoms outward. Cut pattern starts getting
complicated, maximum displacement remains quite the same.
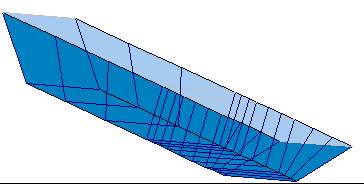
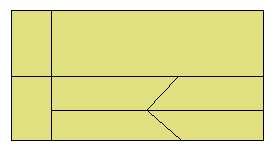
Square punt .hul file.
Optimum cross section
Now that we have an idea what can be achieved by just building the obvious square
sided boxes, let's go a bit further.
The maximum displacement is proportional to boat length and the boat
cross sectional area.
Let's decide we shall use the whole width of the plywood, 48", for boat sides and
bottom, in a simplest flat bottom configuration. We are left with two measurements
that determine the cross sectional area (A):
- the width (s) of the side panel
- the angle of inclination (a) of the side panel.
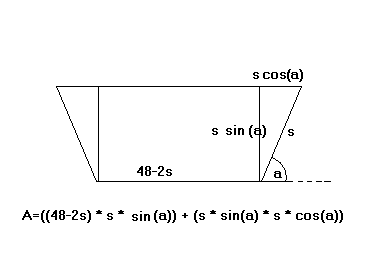
The easiest way to find out the optimum angle and width is to feed the area formula
into a spreadsheet. And mind You, when I talk about "optimum" here I only mean
optimum as far as the maximum cross section is concerned.
The example here is an Excel sheet. From the spreadsheet
You can see that for each side width there is an optimum inclination angle and for each
angle there is an optimum width.
Unfortunately there is only one width-inclination pair which gives the overall
optimum. If You want maximum volume Your choices of cross section are limited.
For example, for square sides the optimum side panel width is 12",
just like the barge and punt above, giving a cross section of 288 sq. in, or 2.0 sq. ft.
But on the other hand, for 12" sides the optimum angle would be 69 degrees, not 90.
The overall optimum is given by an inclination of 60 degrees and a side width of 16"
(and thus also a bottom width of 16"). With this combination the cross sectional area
is 332.6 sq. in, or 2.3 sq. ft, giving a 15% improvement over the optimum square box.
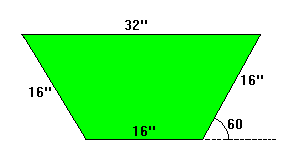
Yes, it's clearly a dory cross section. Raises some questions, doesn't it?
A 16" bottom width is enough to sit on, the 32" overall width is too wide to
paddle with a double paddle but just wide enough to scull. We'll use this cross
section to make a sculling boat.
Note:
The absolute maximum cross sectional area would be reached by bending the whole 48" into a
semicircle. This semicircle would have a 15.3" radius and a 367 sq. in, or 2.55 sq. ft
area. That's a furher 10.5% improvement over the dory shape.
Ok, the one sheet boat will have the optimum cross section, a 16"+16"+16" dory form
with 60 degree sides.
How about the bow and stern?
Bow and stern
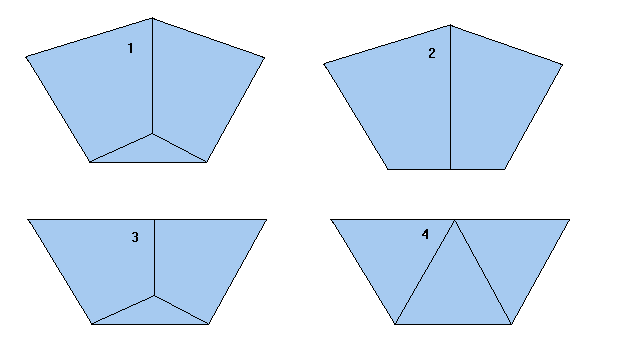
Consider four different bow variations for the one sheet boat
(Actually try to draw them in the
Hullform software and try the pattern nesting Yourself! That's just what I did.).
Sterns could be similar, or cut with a flat transom (Try those, also!)
- A proper dory bow with a rockered bottom and sheerline.
- Looks nice, looks traditional.
- Lost displacement because of the rockered bottom.
- Left over plywood because the side panels are straight, bottom panel tapered.
- Left over plywood because the bottom is shorter than the sides.
- Any left over plywood means lost displacement!
- A dory bow with a flat bottom.
- Looks nice, looks traditional, flat bottom does not show in water.
- Displacement gained back under the bottom.
- Side panels now curve on one side, close to the tapered bottom panel.
- Left over plywood because the bottom is shorter than the sides.
- A dory bow with a flat sheerline.
- Looks nice enough. On a small boat like this a level sheerline seems quite
acceptable.
- Even more left over plywood, but:
- This is an exercise in "where could one save some plywood to use somewhere else?".
- The bottom extending up to the sheerline.
- Looks nice enough.
- With a suitable pattern nesting (designing the plywood cut pattern in the Hullform
software optimally) no left over plywood at all!
- Optimum cross sectional shape maintained throughout the length of the hull.
- This hullform also fulfills Mr. Bolger's theory on side and bottom
curvature similarity.
- Bingo! This is the choice for the optimum one sheet boat!
Hint:
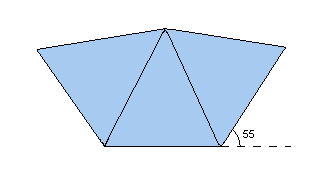
If, after all, You are not after the absolute maximum displacement, and would like
to see some rocker on the sheerline, You can achieve this by giving the sides slightly
more flare.
Replacing every 60 degree measure in the following text by 55 degrees (but doing
everything else just the way described) will produce the desired effect.
Top of the page.
Back to main page.
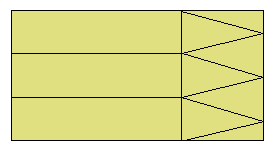
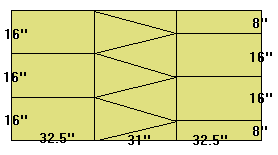
Divide the plywood sheet in two, left part being 65" wide,
right part 31" wide.

Divide the left part into three equal strips, each 16" wide.

Mark the right edge of the right part dividing it 8+16+16+8".
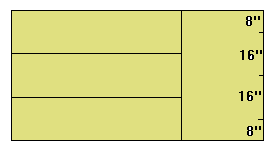
Draw a zig-zag pattern on the right part.
Cut along the lines.
Rearrange the plywood parts.
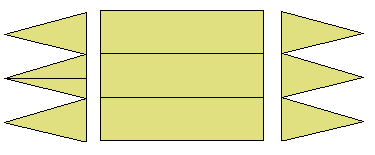
Assemble the parts over temporary frames using any construction method You prefer.
Tape and glue, hard chine...
Hard chine might be the most suitable, as all the chines are straight.
You'll get two prism (hence the name of the boat!) shaped parts like this,
the bow and the stern.
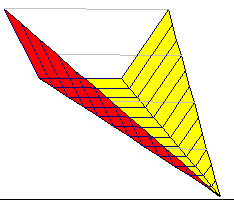
Bow and stern prism .hul file.
And a mid section..
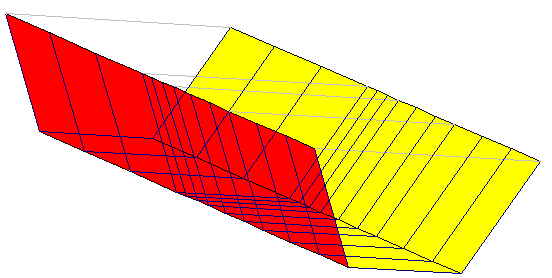
Mid section .hul file.
Assemble the sections together and voila! You have a 10' x 2'8", or 305 cm x 81 cm, one
sheet boat with a maximum
displacement of 1000 lbs (455 kg).
With a 6" (15 cm) freeboard the displacement is 445 lbs (200 kg), 8" (20 cm) freeboard
300 lbs (136 kg) and with 10" (25 cm) 180 lbs (81 kg).
You can clearly see the nicest feature of a flared boat here. The deeper You sink her
the more
she resists further sinking. That's why dories are so safe.
Rounded corners and a different cut
Some might argue, that the angle between the mid section and the ends of the Prism
does not look like a boat should. Instead, the lines should be rounded.
This is easy to accomplish, sacrificing a tiny amount of displacement, though.
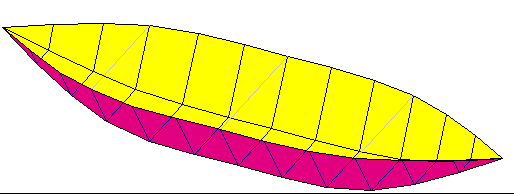
Rounded Prism .hul file.
Assemble the three logitudal strips
first, round off the corners where the mid rectangle meets the end triangle,
then assemble the complete hull.
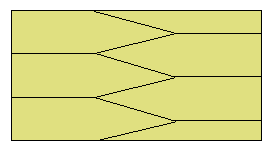
To get rid of the joints between the mid and end sections rearrange the cut pattern:
Move the zig-zag part to the middle of the sheet.
Cut along these lines.
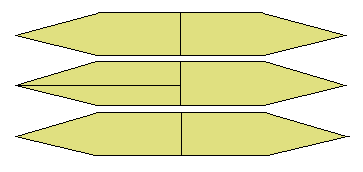
Rearrange the strips, round the corners and assemble.
Top of the page.
Back to main page.
Theory is theory, practice is practice.
Let's build one to see...
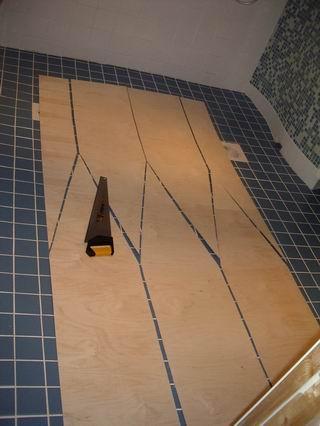 |
I'm using a sheet of 4 mm (5/32") birch plywood to make the boat as light as possible.
The weight of a sheet is about 8 kg (18 lbs).
Mark the cut patterns. In this case I'm using the "zig-zag in the middle" layout.
Cut along the lines. With thin plywood a hand saw is much quicker than an electric
jig saw, cuts will be straight(er) and plywood surface won't get ripped.
And no messing with the power cord.
Yes, I'm working in the shower room. Why? It is the easiest room to clean of all
the saw dust. I built two small boats (a D4 and a canoe) in the living room, that was
enough...
|
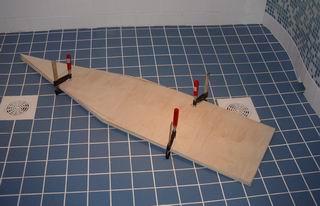 |
Stack the plywood pieces together. This way You can round all the corners in one go.
I'll remove about 1" of plywood from the corner, smoothing over a distance of 8" in
both directions.
|
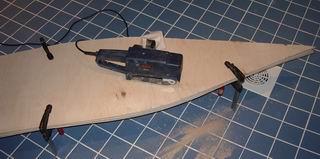 |
I used to hate sanding until I bought this band sander. A number 36 band works
miracles...
|
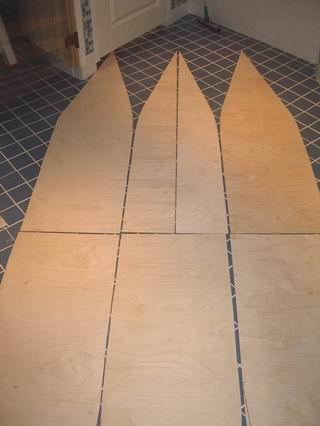 |
Plywood parts ready to assemble.
|
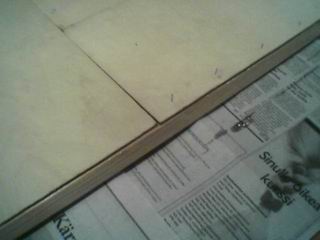 |
Assemble the bottom with chine logs planed to 60 degrees. Suitable material to
start with is about 1"x1.5". The length of each strip
is 49" (125 cm). Spruce is my preferred wood here, because of the light weight.
Yes, of course You can use tape and glue chines. Would look much better.
But not really with the 4 mm plywood.
It is too flimsy, very hard to keep the chines straight.
Anyway, I'm heading towards a light weight boat, and a combination of 4 mm ply plus spruce
chines adds up less than doing it with 6.5 mm (1/4 ") ply and glass tape chines.
Btw, from here on the pictures have been taken with a Nokia 7650 multimedia
phone. Although a nice toy, it is not a substitute for a real camera, as You can see :-(
|
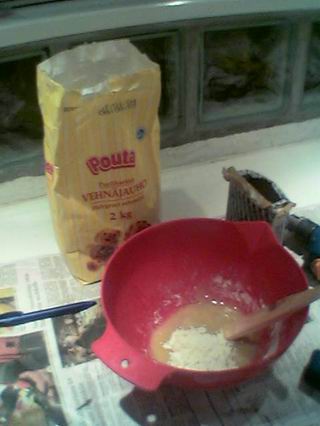 |
I'm using West Systems 105/206 as glue, despite the fact that epoxy resins
always seem to manage to create a real mess (on hands, clothes, tools, floors...).
|
Hint:
Instead of commercial epoxy fillers (=expensive) or saw dust (=coarse) I use wheat
flour. You know, the stuff for bread dough.
It is:
- Close to wood as a material.
- Much finer than wood dust from sawing or sanding, so creates smoother surfaces.
- Almost wood colour (light).
- Available everywhere.
- Very cheap.
- Ecological. When You need to get rid of the excess, just bake a bread and
eat it.
Further hint:
If You need to match filler colour to wood colour, try using other types of
flour also: rye, barley, corn...
And try colouring it with ground cinnamon, ginger...
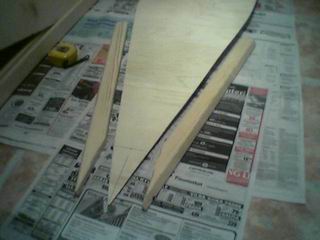 |
Install chine logs to the ends of the bottom starting from the sharp end.
The length of these pieces is 24" (61 cm). Some fitting is needed at the end
where the strips meet.
The rounded corner of the plywood is left open at this moment.
|
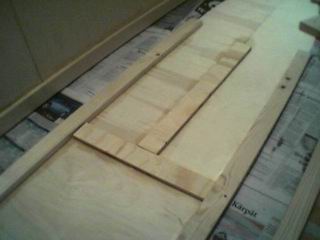 |
Cover the plywood gaps with butt blocks cut out of waste plywood.
The Prism design uses up all plywood from a single sheet, so You have to use
waste strips from an earlier project.
Don't block the bending portion of the split end yet, it is easier to bend
the bottom first.
|
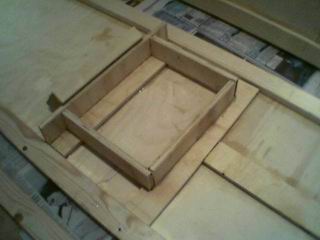 |
In the light of present knowledge: DON'T install these supports around
the seat perimeter. From stability point of view You want Your
center of gravity as low as possible. That is, You want Your seat
as low as possible. I've removed these supports from my Prism now.
Was there a noticeable difference? YES, THERE WAS! Even two inches
made a hell of a difference!
Read the following
"stability section"
first!
|
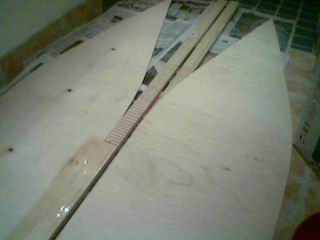 |
Assemble the side panels with the gunwales. The gunwales each have a total length of
131" (333 cm). Suitable material is about 1"x1". (I'm using a wider strip here,
it happened to be at hand.) In both ends they have a straight
section of 25", then a kerfing bend
(with sawn slots) of 16", and a straight mid section of 49".
Align the centre of the gunwale with the side panel centre seam.
Glue and nail only up to the bend.
|
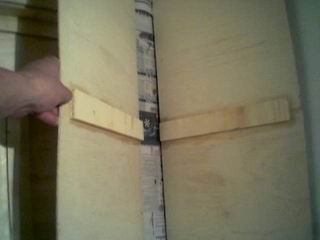 |
Install the side butt blocks.
|
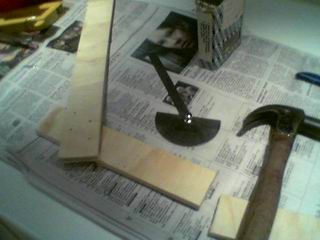 |
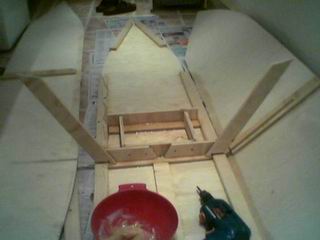
Assemble a frame/seat support. The dimensions of the frame are 16"+16"+16" minus
the thickness of the butt blocks (the frame is going to be attached
on top of the butt blocks) at 60 degrees.
|
 |
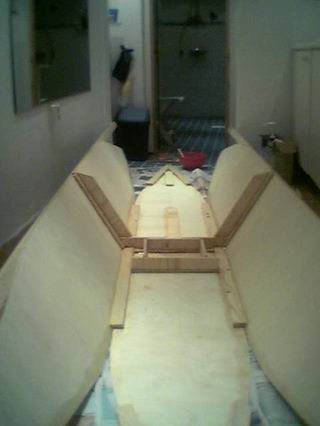
Install the frame.
|
 |
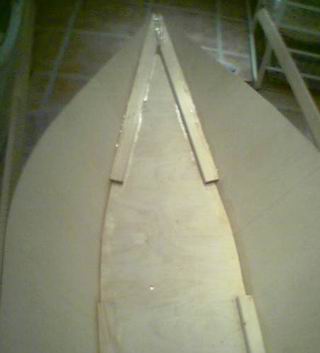
Attach the sides to the bottom.
|
 |
Bend the plywood ends together, glue and nail to the bottom chine logs.
Yes, You could say I'm cutting corners. Chine logs for the straight portions
of the chine and tape and
glue for the bends. But I call it light weight and ease of construction. I'm not
preparing this prototype for a boat show, just a proof of concept.
Fill the open seams from the inside.
|
This is a good point to stop and let the glue harden. Come back the following day.
The next day.
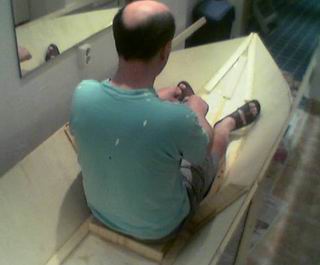 |
Fit the seat onto the frame, but don't glue it on yet. It is so much easier
to paint underneath the seat when there is no seat.
The first careful sit down in the boat (do this before You smear any fresh glue on the
boat ;-).
Since the bottom is flat, this boat tolerates dry rowing. All don't, so be more careful
with other boats.
Find suitable places for a foot stretcher and oarlocks.
|
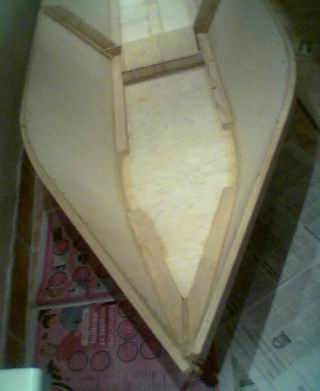 |
Bend, glue and nail the gunwales. The ends may need some trimming.
|
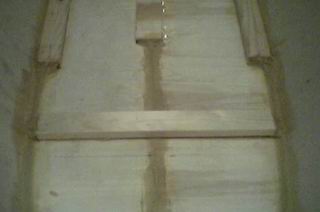 |
Install a simple foot stretcher.
|
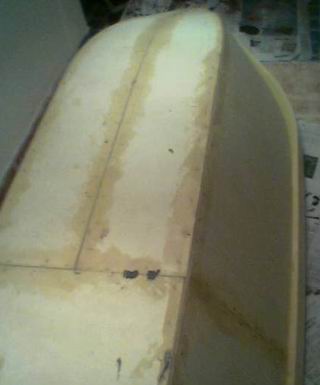 |
Turn the boat over and fill the seams from the outside.
|
Now just wait, wait, wait until the glue and fillers are hard enough to sand.
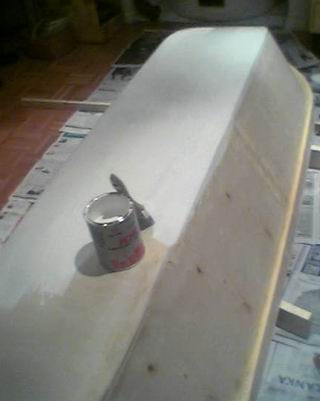 |
The next day, sand the seams and corners and apply a coat of primer.
|
Again, wait, wait, wait until the primer is dry.
Boatbuilding is a little woodwork, a lot of painting and endless waiting for glue
and paint to cure.
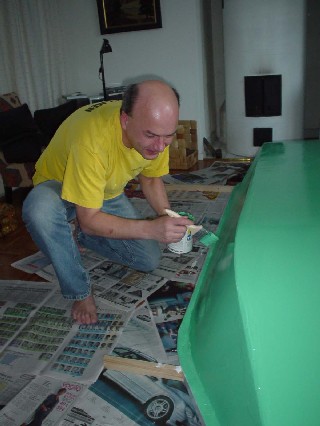 |
A new day again. Painting, painting and painting.
Oh yes, and back to a real camera again, as You can see!
|
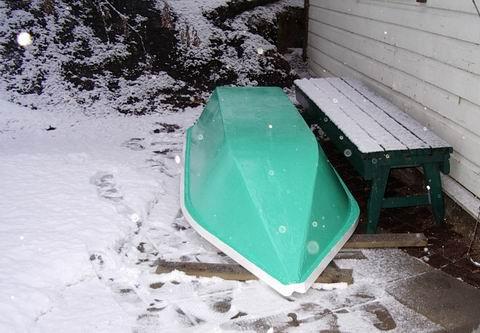
After the paint has dried...
The Prism, ready for her maiden voyage.
Top of the page.
Back to main page.
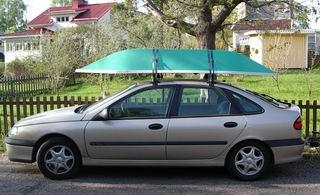 |
Spring time, ice has melted, time for the maiden voyage.
Cartopping her single handed is no problem...
|
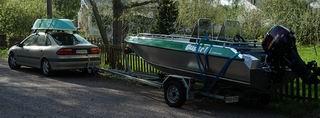 |
...but in case of other problems... better be equipped with
a rescue boat :-)
|
 |
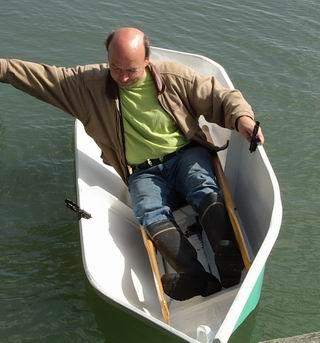
With my 90 kg (200 lbs) she floats high.
I don't feel, nor do I look like I'm a giant sitting on a
child's toy.
6' (180 cm) sculls feel quite right.
|
 |
The question of her stability?
Her waterline beam is narrow, so as one might expect, her initial
stability is low. She feels very lively under You when You sit
upright. Almost scary, until You learn to trust her and relax.
|
But her sides are high and flare a lot. That puts the center
of gravity (= center of gravity of me, because my weight is much
more than her weight) low and far from the gunwale.
And the flaring side is straight (= maximum flare) for almost
the total length of her.
That again moves a lot of buoyancy to the side when she heels.
These together give a rather good secondary stability. That is, she
stiffens a lot as she leans to the side. On the picture You see
me leaning over as far as possible.
No, I'm not cheating. Although You can't see it, my right hand is
not grasping a support, just thin air ;-)
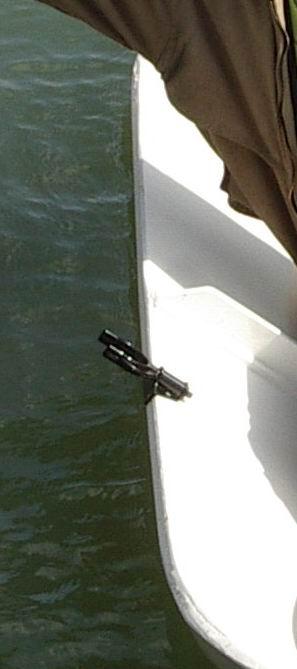 |
"As far as possible" meaning: her gunwale touching water. At
this point she feels solid and dependable.
So is she stable?
Her initial stability is low, her scondary stability is high.
Stability is a lot about the relative positions of the center
of gravity and the center of buoyancy. In a light boat the center
of gravity is mostly You: Where is Your center of gravity, how
stable are You?
|
In spite of the fact that her design criteria were big volume
and boat looks, not stability,
she is stable enough for my center of gravity. So I'm headind for
the start line of the first cross Atlantic single sheet boat race.
See You there!

Hey, I was just kidding! A small boat is only for protected waters,
always with a life west, and only when the water is warm.
Me not wearing a life west in the pictures?
The water wasn't warm either :-]
And now a quiz for all You navy guys: What special can You
see in this picture?
Nothing??? You should have seen a Russian naval base.
This strait was a base for
Russian galley fleets at the end of the Great Northern war (1700-1721). In
years 1718-1720 up to 20,000 men have been known to have camped on these
shores.
Top of the page.
Back to main page.
You may have wondered where did the width of the zig-zag part, 31", come from.
Out of the blue?
Not quite. The length can be selected freely between 14" and 96" (the whole sheet!).
The shorter the zig-zag, the blunter the ends of the boat and the shorter the boat.
And vice versa.
31" gives the longest boat with a theoretical maximum displacement exceeding the magical
1000 lbs limit.
That's why 31"!
The range 30"-50" gives You boats that look like boats, in my opinion.
This Excel sheet gives the maximum displacement and the boat
length as a function of the zig-zag part width. With 19" zig-zag 1027 lbs is exceeded!
Hint:
If You want a boat with different ends, a sharp bow and a blunt stern,
then just build two boats. One with a longer zig-zag, one with a shorter.
Then just "mix the parts" to get two bows out of the longer zig-zags, two
sterns from the shorter.
Top of the page.
Back to main page.
The box punt shape could be given a facelift using either of the Prism construction
principles.
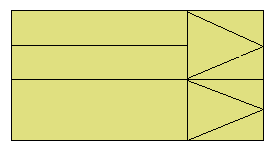
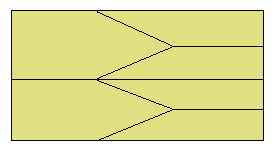
But why bother?
Top of the page.
Back to main page.
The construction principle described above is not limited to the shape nor to the size
of a standard plywood sheet. Any rectangular sheet will do.
The width of the boat will be 2/3 of the width of the sheet. The length will vary,
depending on the width of the zig zag-zone, between about 1.25 to 1.5 times the
length of the sheet (if we stay within "nice boat shapes").
Let's try this on a one sheet kayak!
First, cut a sheet of plywood in three equal pieces.
Rotate each part by 90 degrees.
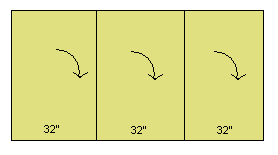
Join the pieces. You get a new kind of a plywood sheet. Same area, but
sides (32"x144") differing from the original.

Cut the plywood as in the basic Prism, using a zig-zag zone width of 72".

Assemble, and You'll get a 18' x 21" (5.4 m x 53 cm) one sheet kayak!
But mind You, this kayak is likely to be very tender. Not for a beginning
canoeist nor for the clumsy, like myself.

One sheet kayak .hul file.
If You prefer wider, stabler, shorter version, here's another cut pattern providing plywood
parts for a 13'4" x 27" (4 m x 70 cm) kayak.
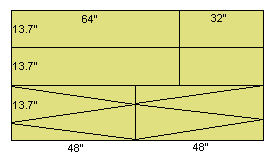
Two triangle parts, instead of one, need to be assembled with a central seam. Sides, 64" long,
are of a single piece of ply, the bottom has to be made of two 32" pieces.
I haven't built a kayak prototype yet (but that's changing, see
the "Dug"),
but if I did, I'd have great difficulty in choosing
between two ways to go:
- Build one in the spirit of a jungle dugout (a pipante, a curiara, a mokoro). Rather heavy construction,
1/2" (12 mm) ply, stitch and glue seams. Flare the sides to 55 degrees, to get a flatter craft
and raise the ends a bit. And I'd try to get by without using any clear
wood reinforcement strips on the gunwale either, just round the edge of the ply.
And paint the thing dark brown.
- Build a very light version in the spirit of a northern origin. As light as possible,
but with decking. I'd use as thin plywood as possible, probably 5/32" (4 mm), build with
thin chine strips, thin gunwale strips glued on the inside, thin cross beams across the
top at every 2' (60 cm) or so and a decking of canvas, waterproofed by oil paint, white
paint.
Top of the page.
Back to main page.
Yet another way of cutting the sheet.
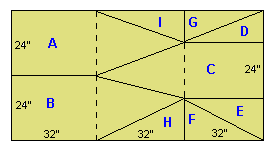
Assemble the parts first like this to create the boat bottom and side pieces.
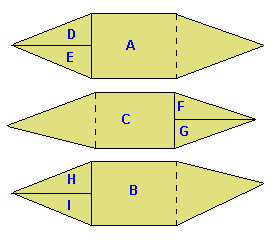
After that, round the corners and bend the sides and bottom together
like in the "original" Prism above.
Bending the pieces may prove difficult, especially if You are using plywood
anything thicker than a "door skin", 1/8" that is. In that case, just
cut the pieces along the dotted lines (or don't glue them together along
those lines to start with). Then assemble the pieces in a "real prism"
fashion as pictured above, in the
So this is how we'll build her section.
And the resulting boat will be a 6'9" x 4' (205 cm x 122 cm) Prism.
Ugly, maybe, but the maximum displacement will be about 1300 lbs (590 kg). That's about
as far
as You can go with this concept and still claim it looks like a boat!
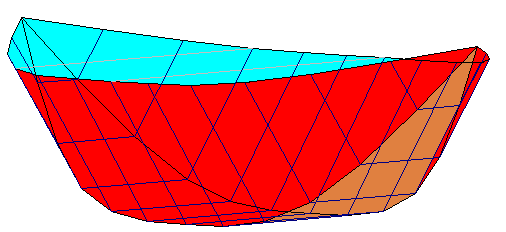
Bow and stern fat prism .hul file.
Fat mid section .hul file.
With a 6" (15 cm) freeboard the displacement is 778 lbs (354 kg), 8" (20 cm) freeboard
630 lbs (286 kg) and with 10" (25 cm) 495 lbs (225 kg).
This clearly is a one sheet boat capable of carrying three people! Well... sort of,
anyway. Would be rather crowded...
Actually, there is no limit to ways of cutting the strips.
You can make a boat out of any number of sharp ended strips using this simple
principle. Three strips seems to be the sensible choice, however.
Top of the page.
Back to main page.


