18' One Sheet Canoe, the "Dug"
Free plans and building instructions

"Dug" plans
Building the "Dug"
Maiden voyage
Epilogue

Back to main page.
The prospect of building a one sheet kayak, as presented in the
original
Prism section, has aroused some
interest. The original "maximum volume" kayak Prism would not
be suitable for a kayaking
beginner, however, unless he or she was equipped with excellent
balancing abilitites. This design is an attempt to overcome the
balancing difficulties inherent in the original "maximum volume"
design. The design has been modified, using the righting moment
calculator from the Stability section
as an aid, to give an acceptable compromise between stability,
volume and looks.
Now this is the result. I think "looks" is the winner, whereas
"volume" is the loser. The predicted feeboard with myself onboard
is about 3.5" (9 cm), so strictly for calm waters, if undecked.

One sheet "Dug" .hul file, as I thought
it would be. I thought she would be a 16' canoe. Finally, she
turned out longer than this. Also, the ends turned out better looking
than this, but see for Yourself.
But why "Dug"? Small boats, like these one sheeters, are usually
made out of thin plywood. And then stiffened using various wood
strips here and there. But how about some "opposite thinking"?
How about using thick plywood? One could
think of several advantages:
- Thick plywood is easier to handle than thin (=flimsy) plywood.
- Thick plywood is stiffer, so straight surfaces stay straight.
- Edge to edge glued seams have more holding surface, so glass
tape (which I dislike a lot) may be unnecessary.
- Thick plywood allows more material to be rounded off, allowing
even a bit of "round chine look".
- One may get away without gunwale etc. stiffeners, thus reducing
the amount of work dramatically.
- One gets slightly more volume.
Possible disadvantages, again:
- Thick plywood is difficult to bend.
In this design it should
not be a problem, since the curves are very gentle.
- Thick plywood is heavier than thin plywood.
So we have to
select light wood. A sheet of 12 mm (1/2") spruce ply weighs
about 16 kg (36 lbs), which is fine, if no other wood "decoration"
need to be added.
Imagining this design, made of 1/2" ply, without any extra wood
strips, immediately reminds me of the South American "pipante"
dugouts (not that I'd ever seen one). That's why "Dug".

Ok, I'll build the prototype out of 12 mm (1/2") spruce ply.
The cut pattern follows the Prism idea. The ply is first cut
into three straight, equal strips, each 16" wide. It is a good
idea to let the lumber yard do this cut, unless You have a proper
circular table saw, to get the cuts straight.
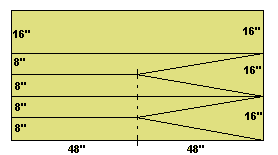
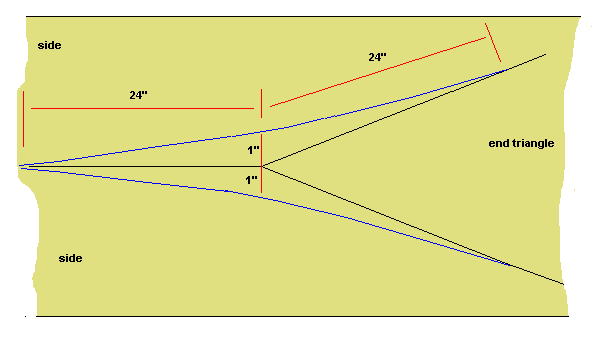
But the rest of the cuts should not be straight. It makes sense
to round the corners off while separating the side pieces and the
bow and stern triangles. All corners are rounded in the same
fashion. 1" from the corner, faired over a distance of 24"
to either direction.
This is an example of how to cut (not drawn to scale).
Cut along the blue lines, not
the original black lines. This cutting in effect moves
a piece of ply from the rounded piece to the "point" of the
neighbouring piece. This, again, has the effect of making the
canoe very ends slightly fuller and longer. Which is not bad,
imho.
Dug resistance curves at 105 kg / 230 lbs total displacement
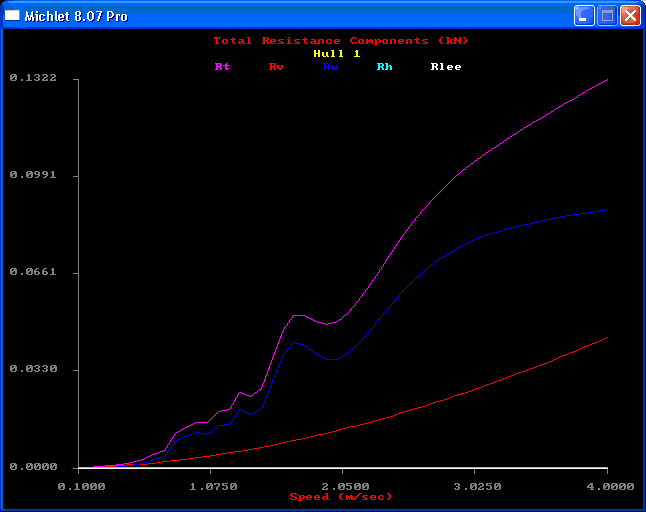 |
One might think that wave forming resistance of a hull as
long and slender as this would be smaller than frictional resistance.
This is not, however, the case in this case. Although the ends hanging
in the air are sharp, the underwater part of Dug
hull has to be rather
blunt to get all that displacement and length out of a single sheet of
plywood at the same time. Hence the dominant wave forming resistance.
Which is not high at all, however, so no worry :-)
|
Rt (violet curve) = total resistance
Rv (red curve) = viscous resistance (friction)
Rw (blue curve) = wave forming resistance
Rh (pale blue curve) = resistance created by transom stern
Full speed scale = 4.0 m/s = 14.4 km/h = 9.0 mph = 7.8 knots
Top of the page.
Back to main page.
Ok, let's build a "Dug" prototype.
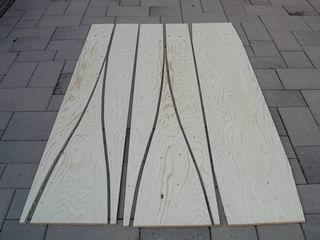 |
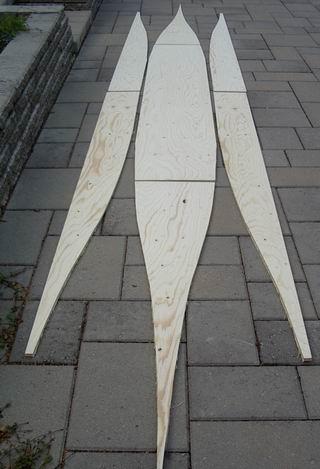
A sheet of 12 mm (1/2") spruce ply sawn into pieces along
with the plan given above. The straight cuts were done
by the lumber yard, the curved ones using an ordinary
hand saw. Gentle curves like this work out much smoother
with a hand saw than with an electric jig saw.
Note, how the curvature has changed the side piece "points".
The points are not sharp, but 1" wide. Similarly, the
end triangles have gained some 20" extra length.
|
 |
The pieces rearranged into a boat shape. Note the end
triangle extra length, we're going to use it. There's
a prospect for some 19' total length here (Out of which
only some 10' touch the water, but so what?).
Actually, by fairing over
48" instead of 24" to either direction
this design could be extended to a 24' length over all.
That's three times the length of the plywood sheet!
|
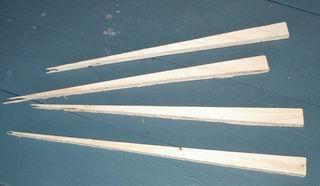 |
Oh, I almost forgot these pieces that came off the corners
of the bottom piece. They will be used to extend the sides.
|
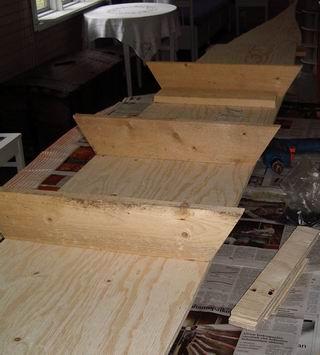 |
Three temporary frames, ends cut to 60 degrees, attached
onto the bottom with drywall screws. One in the middle,
the others at 20" distances from the middle one.
The butt seams on the bottom and sides are made using
glass tape butt blocks. But that's all glass tape I'm
going to use.
|
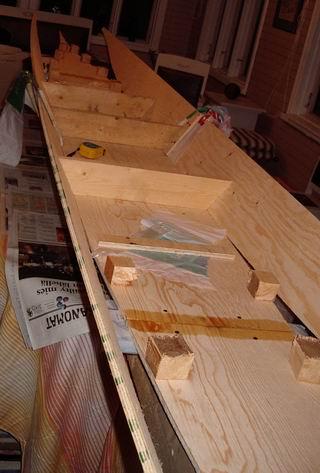 |
Sides attached to the frames. At the center frame the side attachment
screw has to be very close to the bottom, since the sides will
flare out slightly at that frame.
I'm too lazy to drill all those holes and tinker with copper
wire or wire clips, so I'm using the "2x2x2 block & drywall screws"
method instead.
|
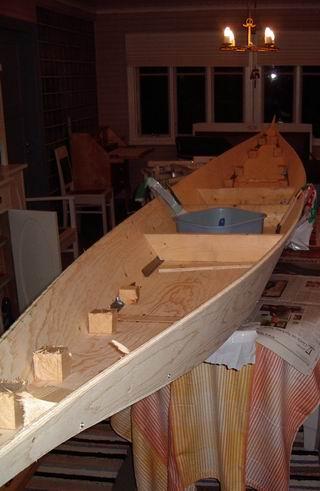 |
Sides bent to the final shape, held together with 2x2x2 wood blocks
and drywall screws through the bottom and the side.
|
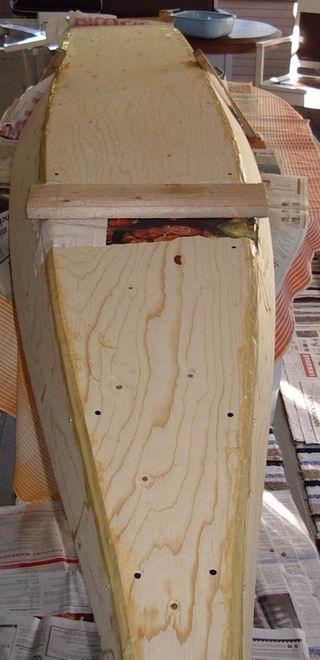 |
The outside seams glued. I'm not going to use glass tape here.
Regard this as an experiment.
|
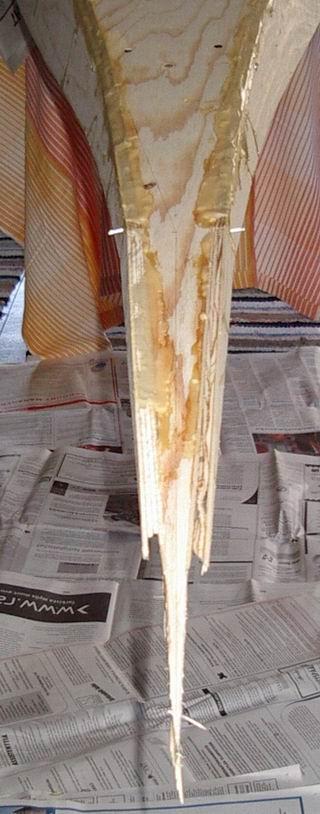 |
The ends of the boat are dangerously sharp. I'll sacrifice one foot
of the overall length for safety. The boat would total 19', but I'll
cut off the sharp points and round the ends, leaving it a pitiful 18'.
These sharp points are the only wood waisted, in addition to the saw
dust.
|
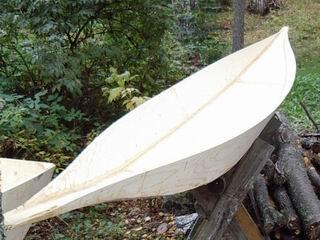 |
The 18' x 2'1" hull ready to take paint. As You can see, this is a true one
sheet boat. Absolutely no extra wood in addition to the single
sheet of
plywood.
|
Top of the page.
Back to main page.
 |
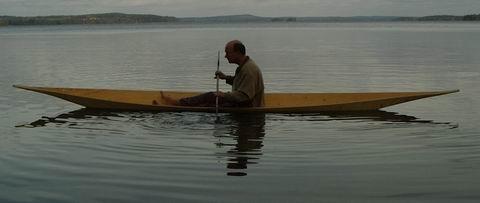
Taking off from the beach.
The boat is treated with linseed oil, that's why
she looks like plain wood.
|
 |
I was slightly concerned about the freeboard, but it doesn't
seem to be a problem. Might be another story in a power boat
wake, however.
|
 |
She can even be heeled.
|
 |
Yeah, this is great!
|
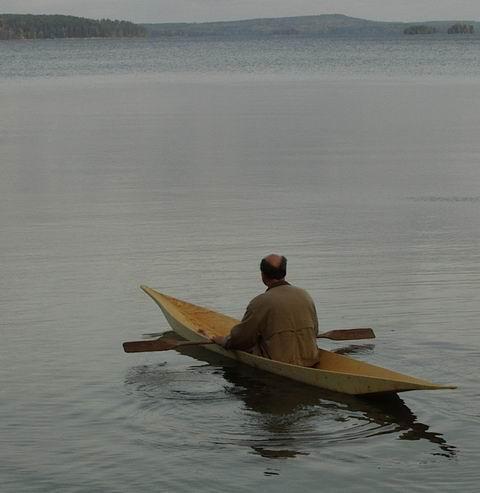 |
And this is peace.
|
Top of the page.
Back to main page.
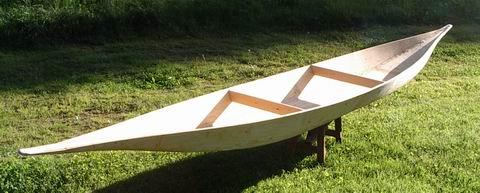 |
Some added comfort and control. A low backrest 12" abaft
the middle of the canoe, and an accompanying foot brace
at a distance where I felt comfortable.
|
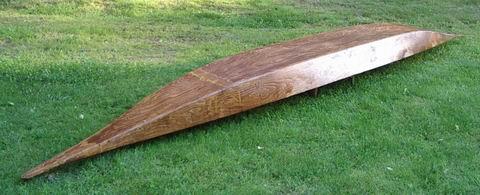 |
A dugout pipante could not possibly be spruce coloured.
Now it's closer to what it should look like.
|
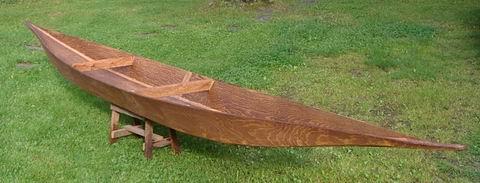 |
A dark brown water repellent corrected the breach in
style.
|
Top of the page.
Back to main page.


